8-bit website เขาทำกันยังไงบ้างนะ?
พอดีได้ใช้ skillshare ฟรีจำนวน 2 เดือนแล้วเจอคอร์สนี้พอดี เลยลองมาทำเว็บ 8-bit ดูว่าจะเป็นยังไงบ้าง
หน้าตาคร่าวๆจะเป็นดังนี้
อันนี้เป็นคลิปแนะนำคอร์สเรียนเนอะ
ตัวอย่างหน้าตาจะเป็นแบบนี้จ้า
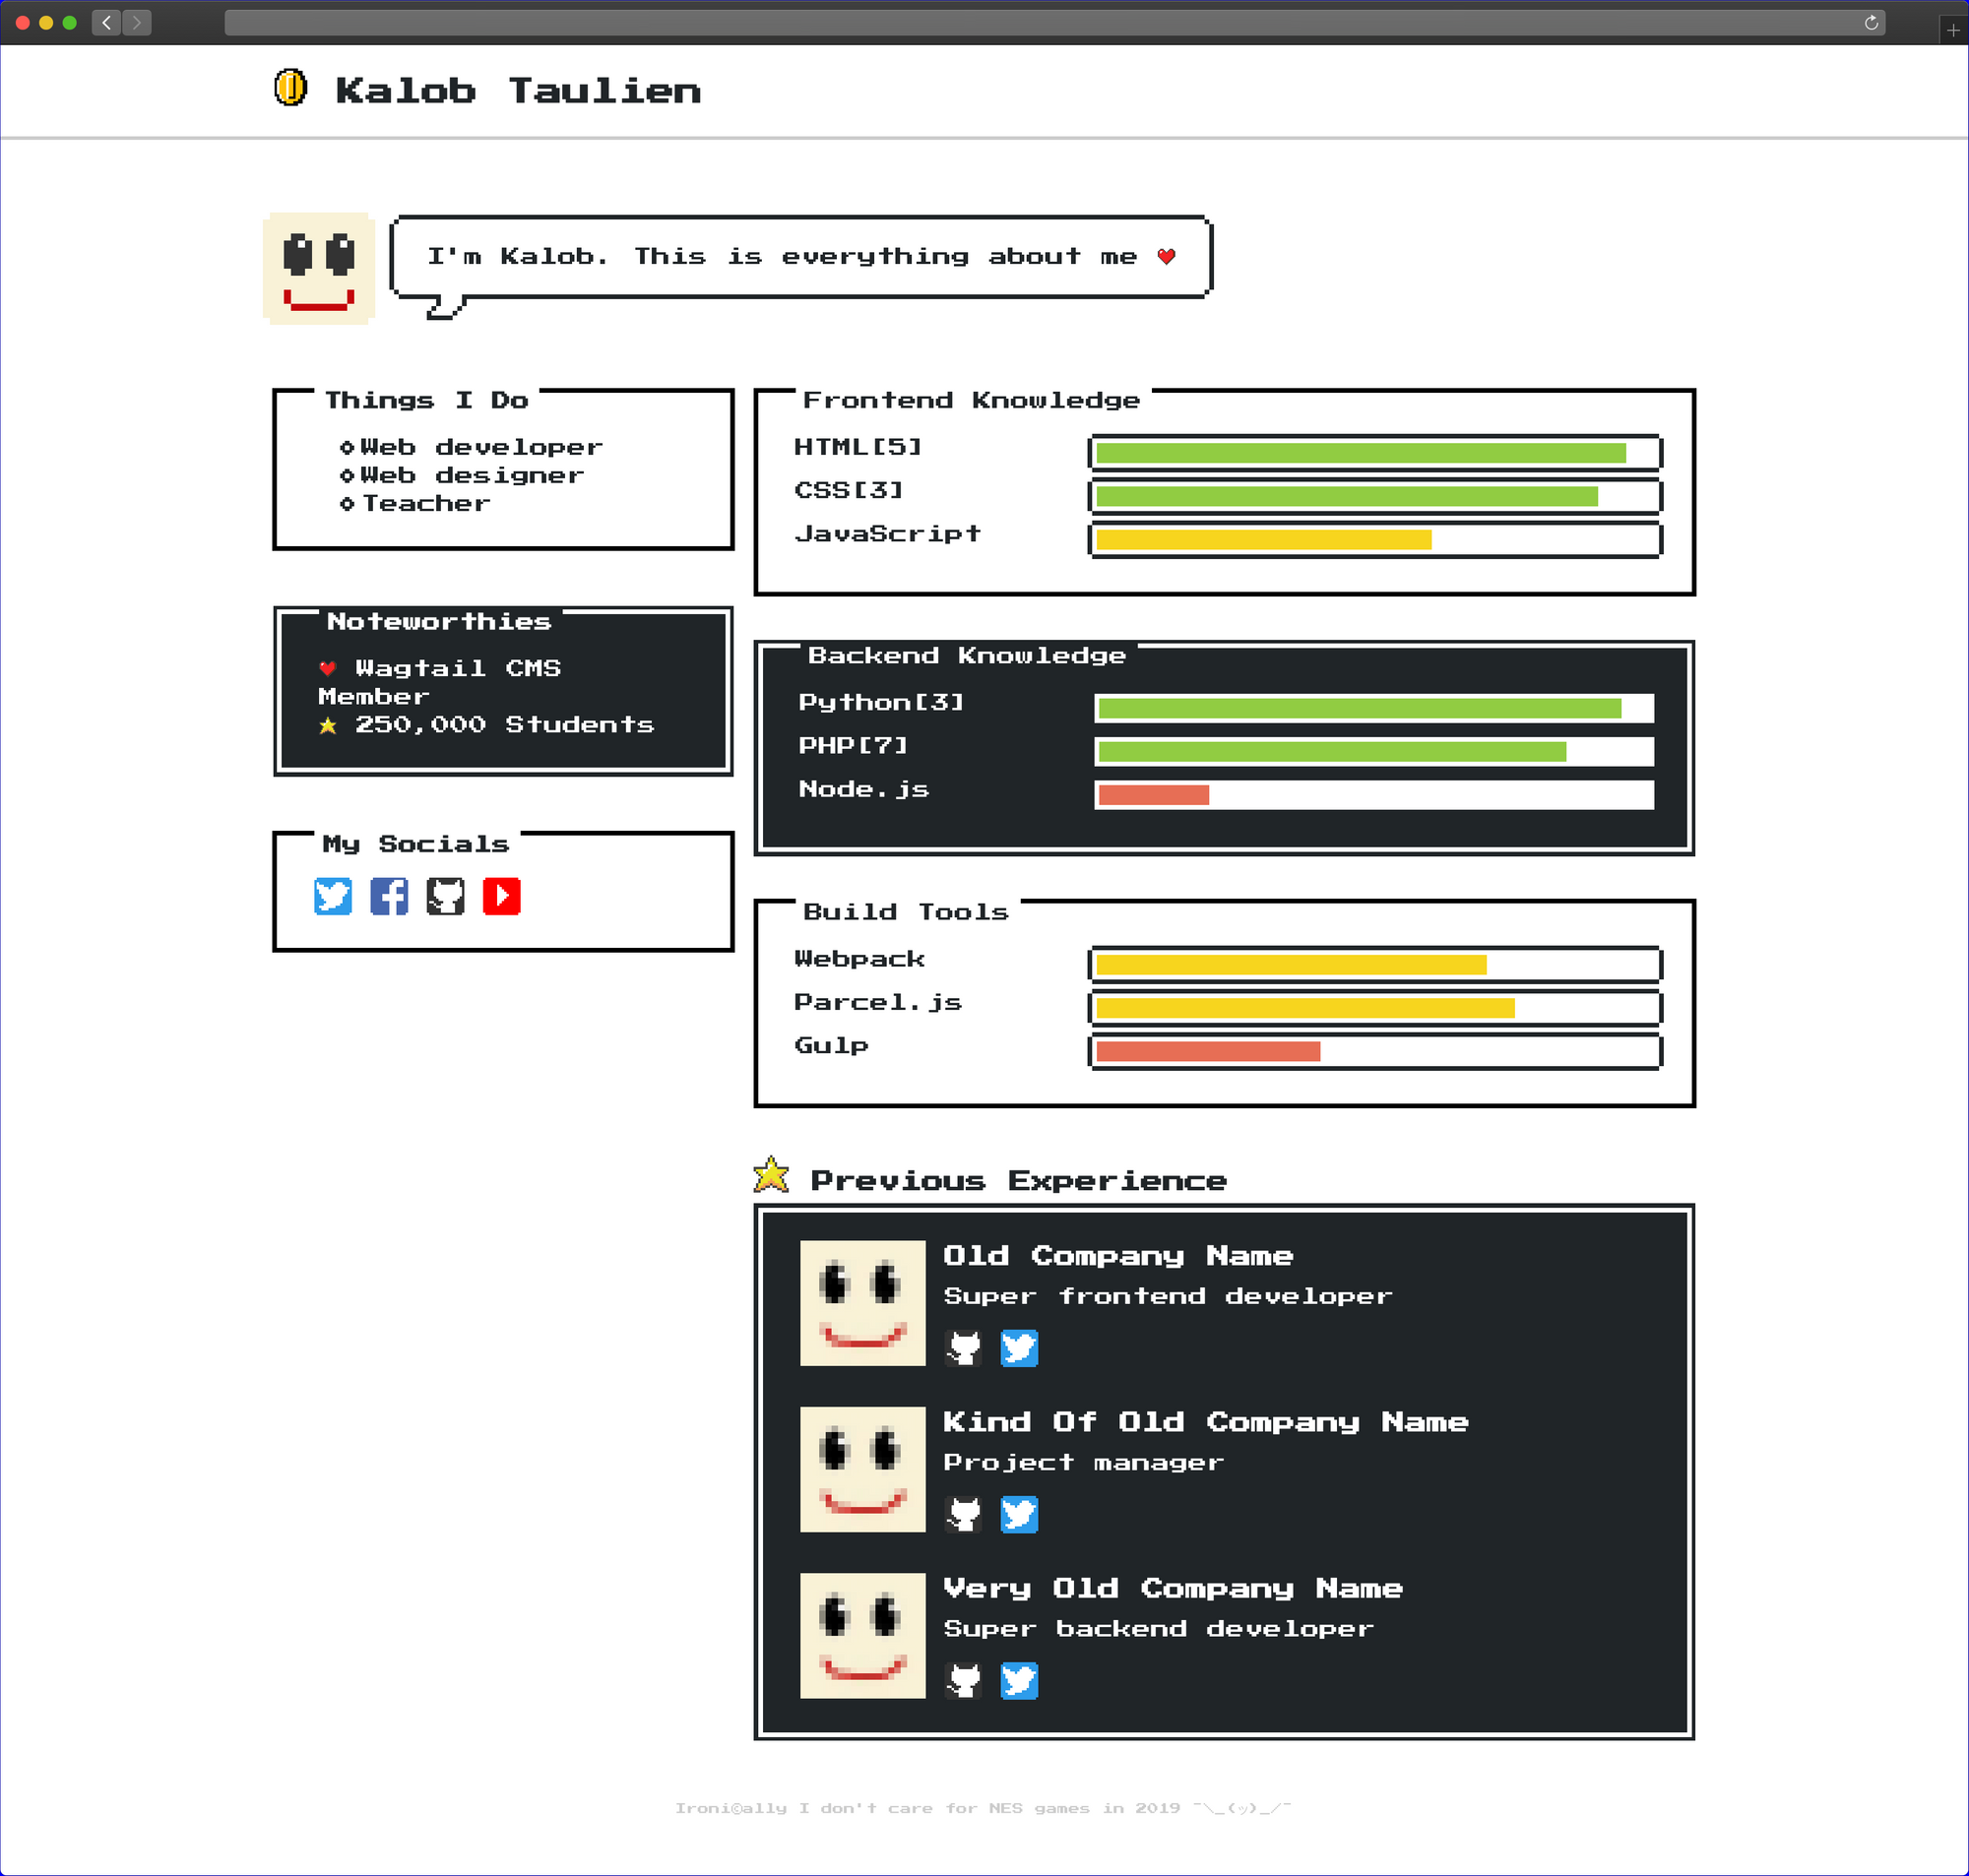
ซึ่งเราเรียนคอร์สนี้เนอะ
 Kalob Taulien
อ่ะมาเริ่มกันเลยดีกว่า
Installing 8-bit
ก่อนอื่นใช้ HTML5 template ซึ่งทางเราก็เพิ่งทราบว่ากดแบบนี้ใน VS Code ได้
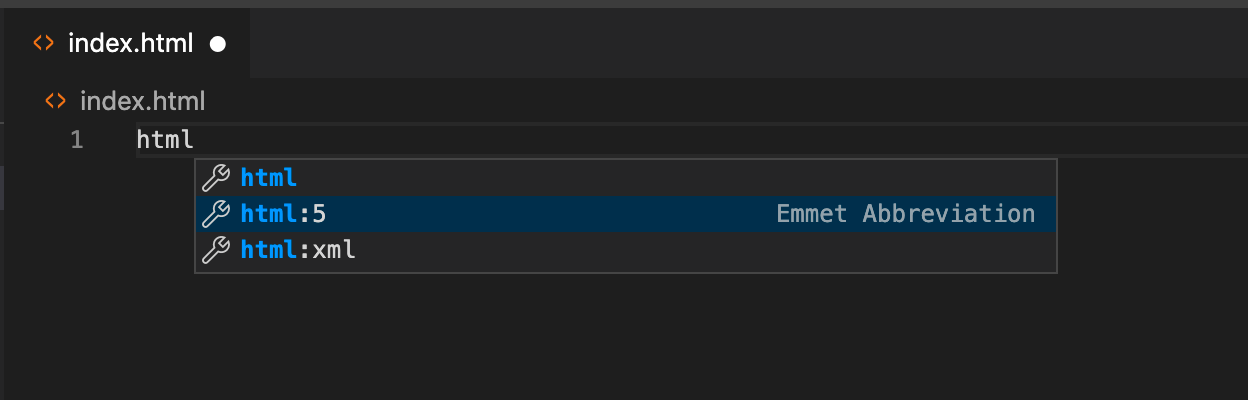
กดปุ๊ปมาล้าวสวยงาม
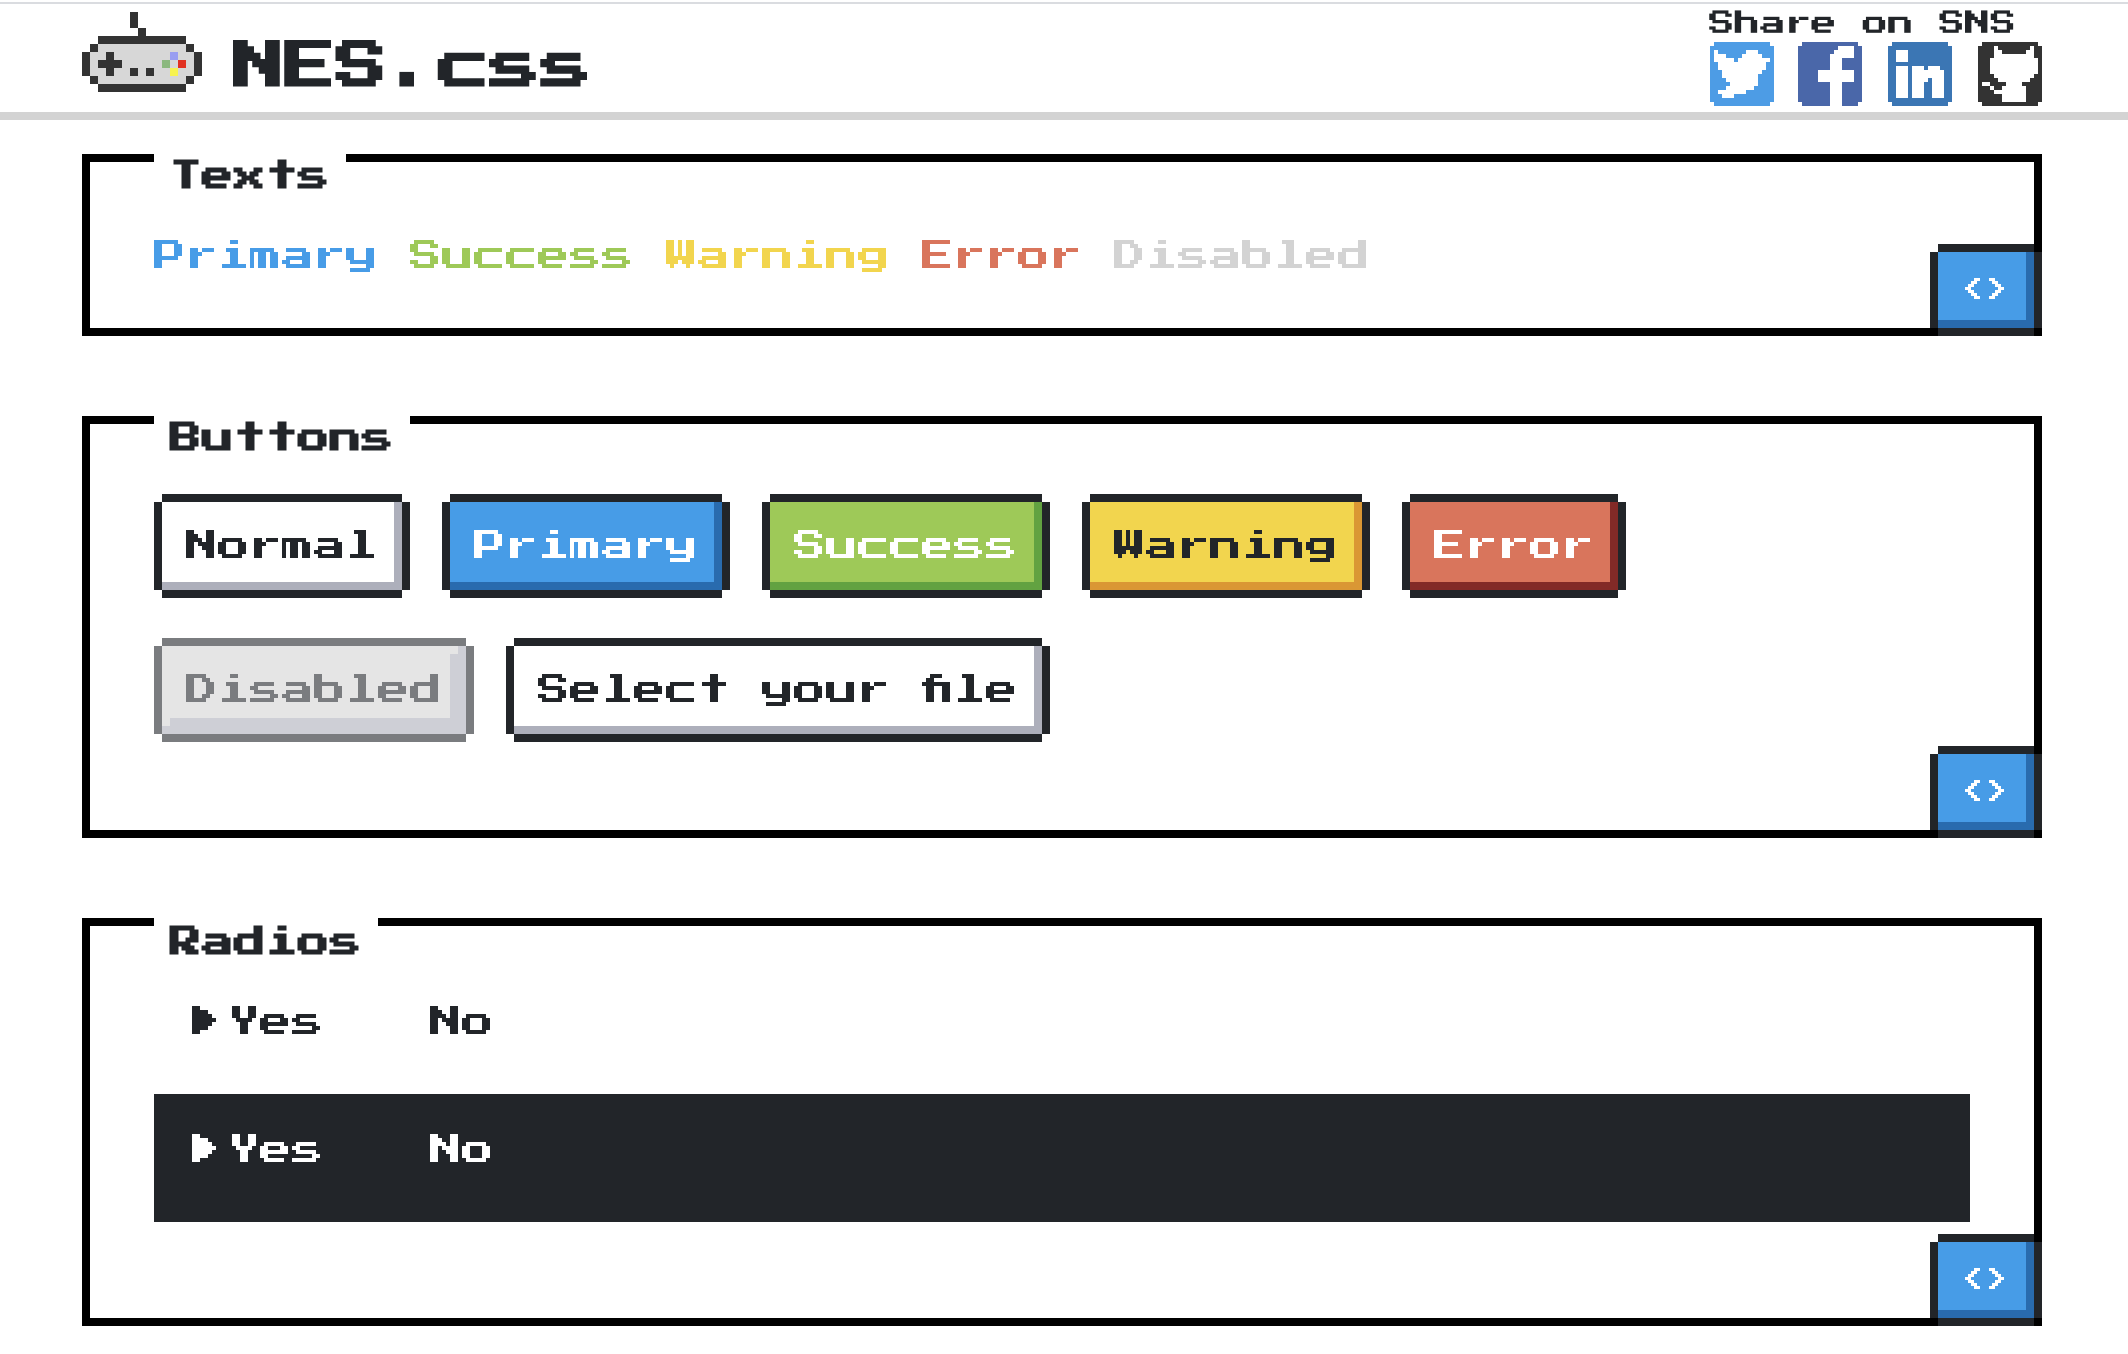
ในที่นี้เขาจะใช้ NES.css เนอะ มีหลายๆ view ให้เลือกใช้กัน
 © 2018 B.C.Rikko
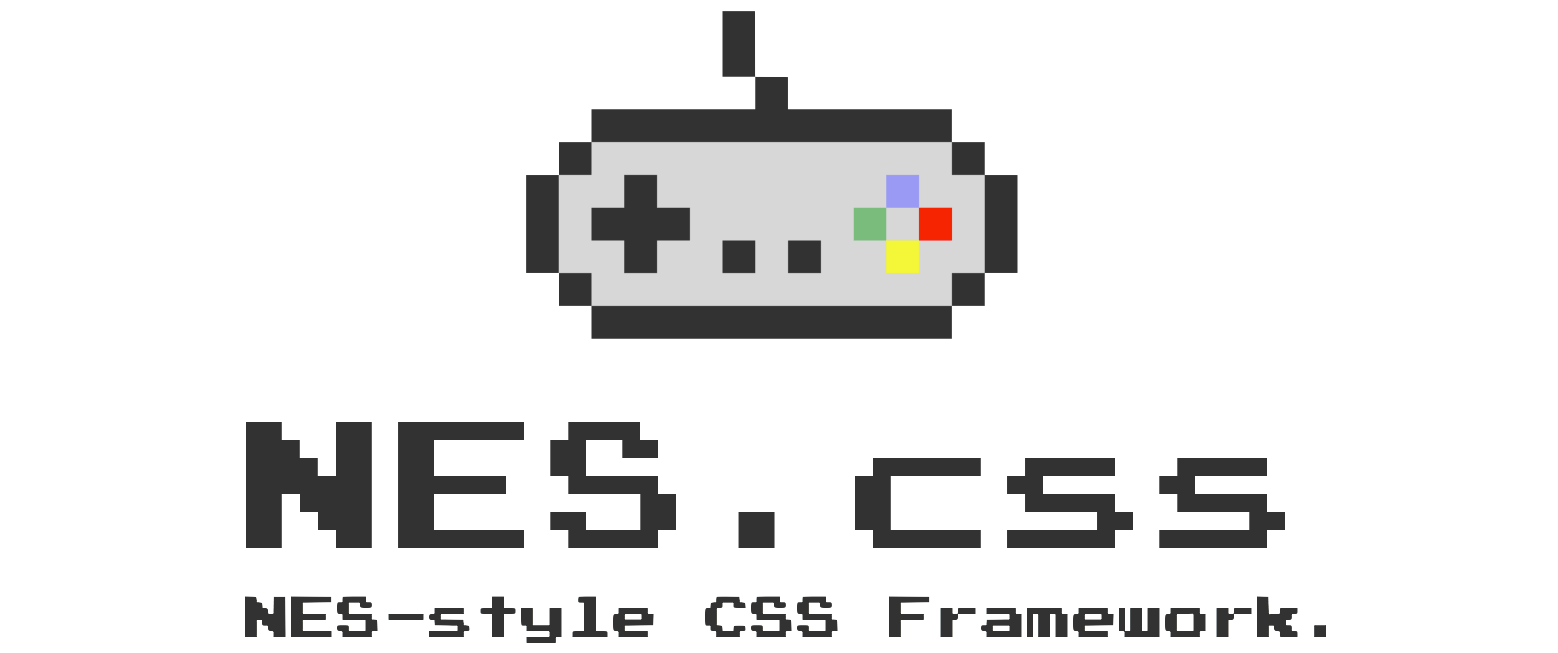
และการ install สามารถดูได้ที่นี่เน้อ
 nostalgic-css
ตัวธีมนี้ใช้ font ที่ชื่อว่า Press Start 2P เนอะ

สุดท้ายจะต้องได้เป็นแบบนี้นะ

Navigation bar
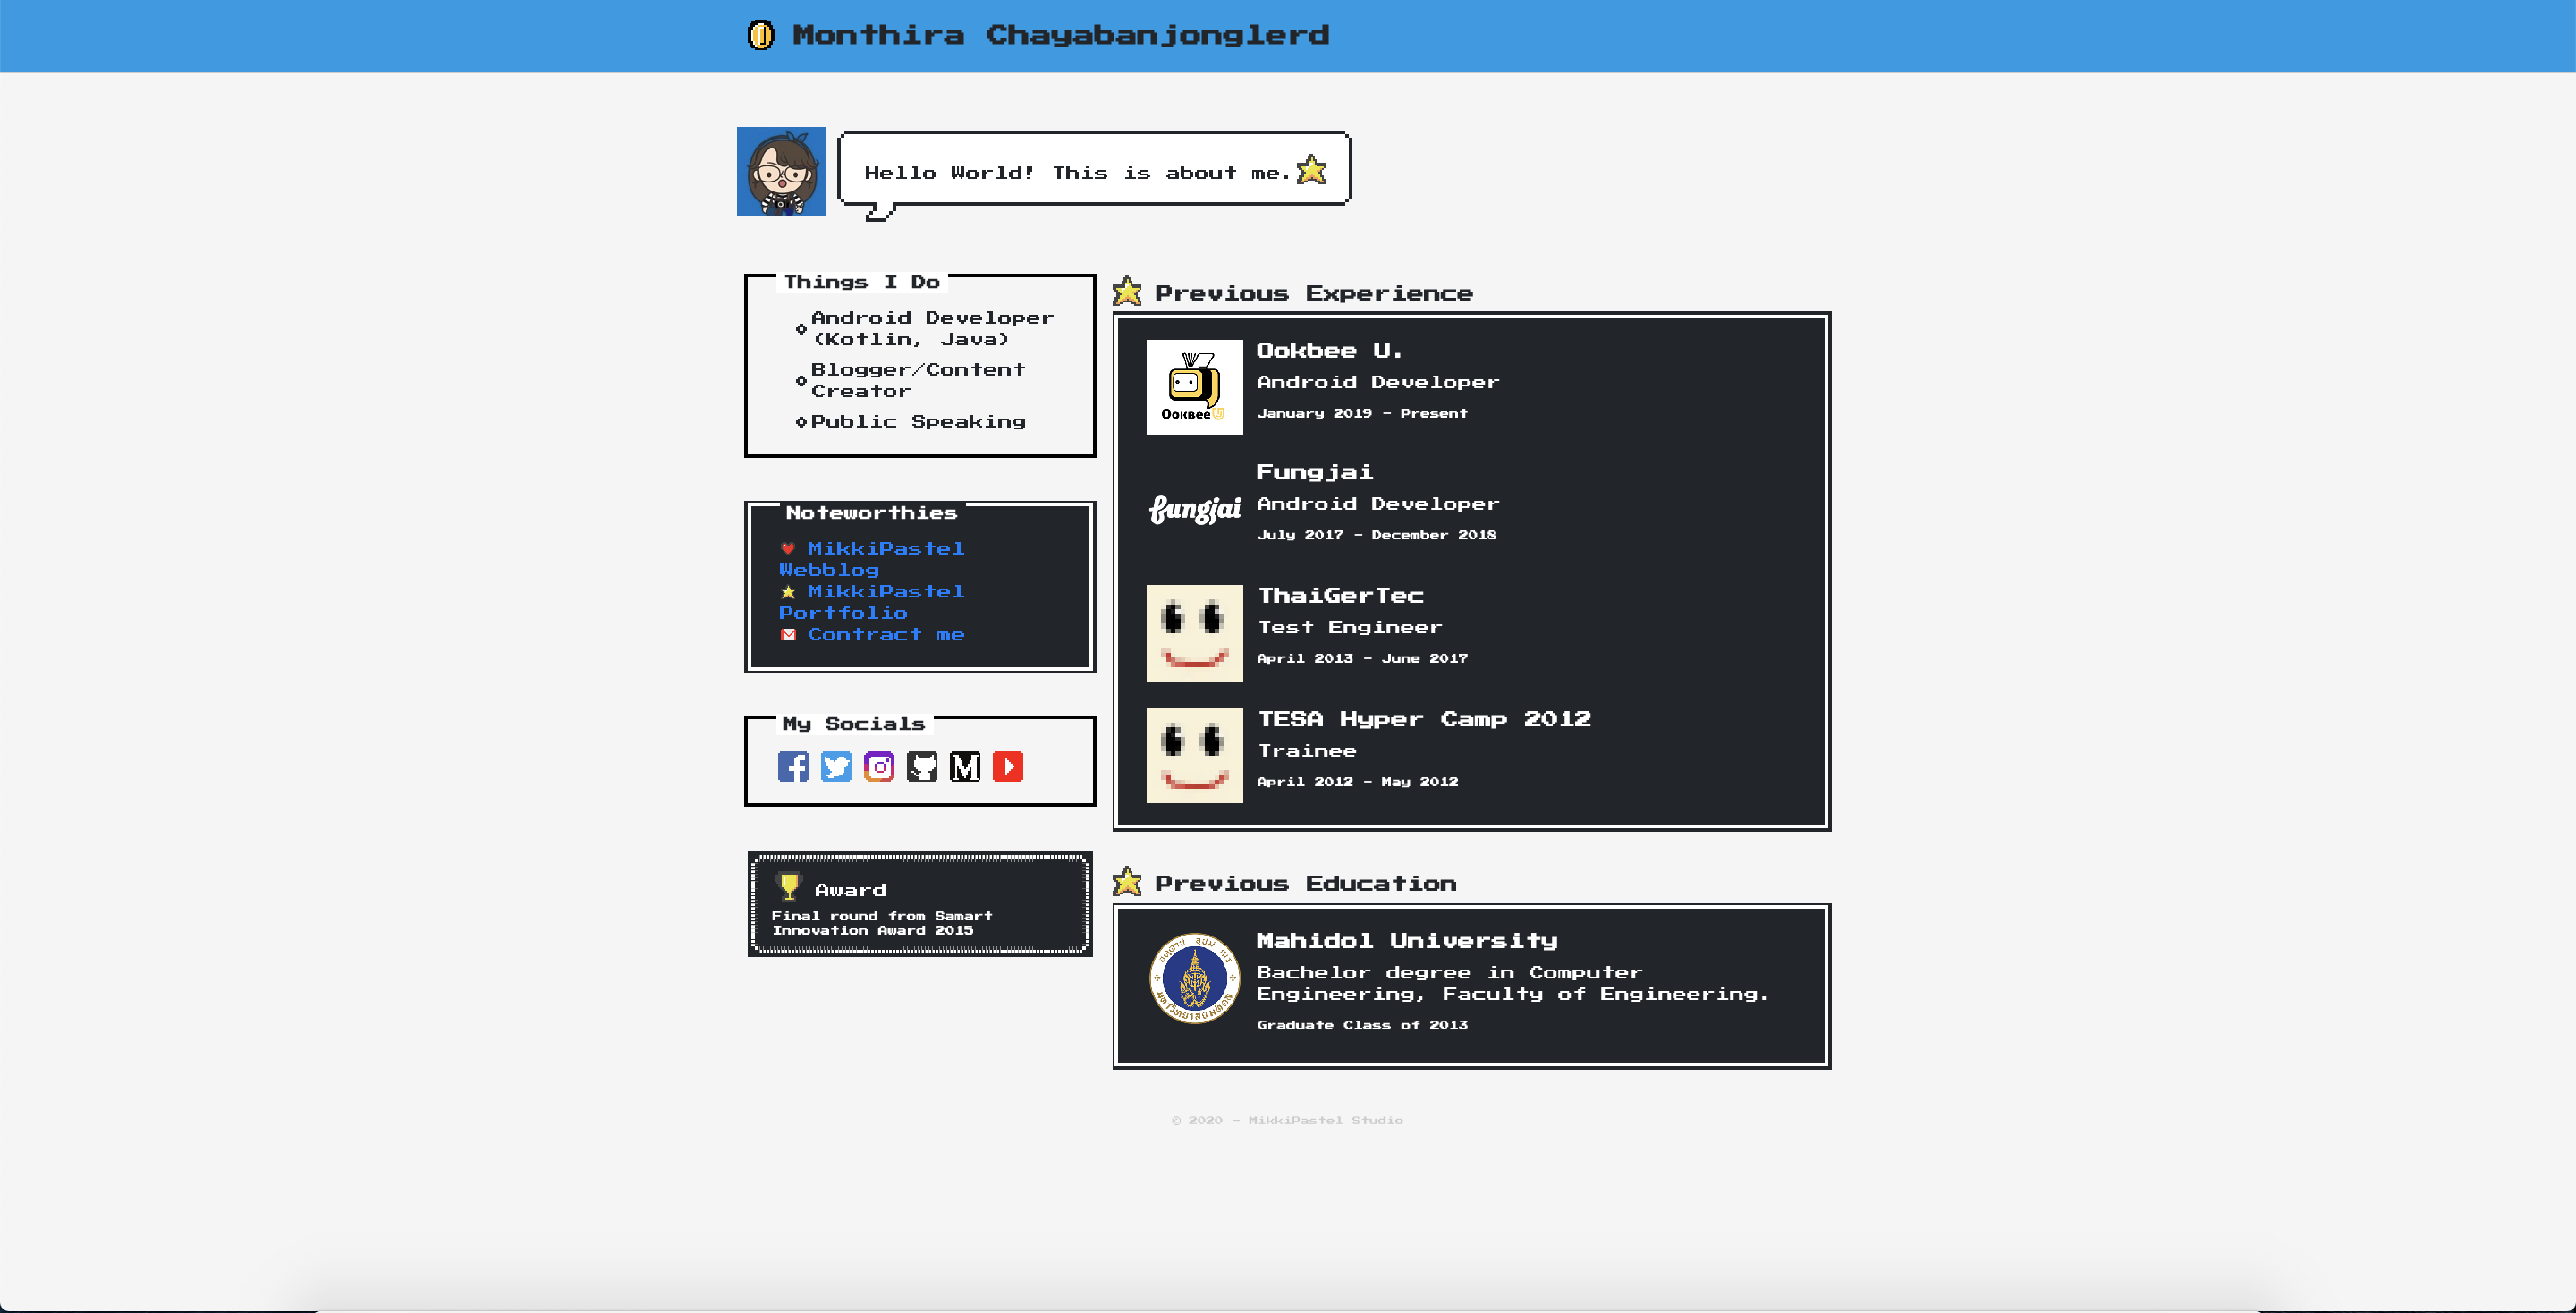
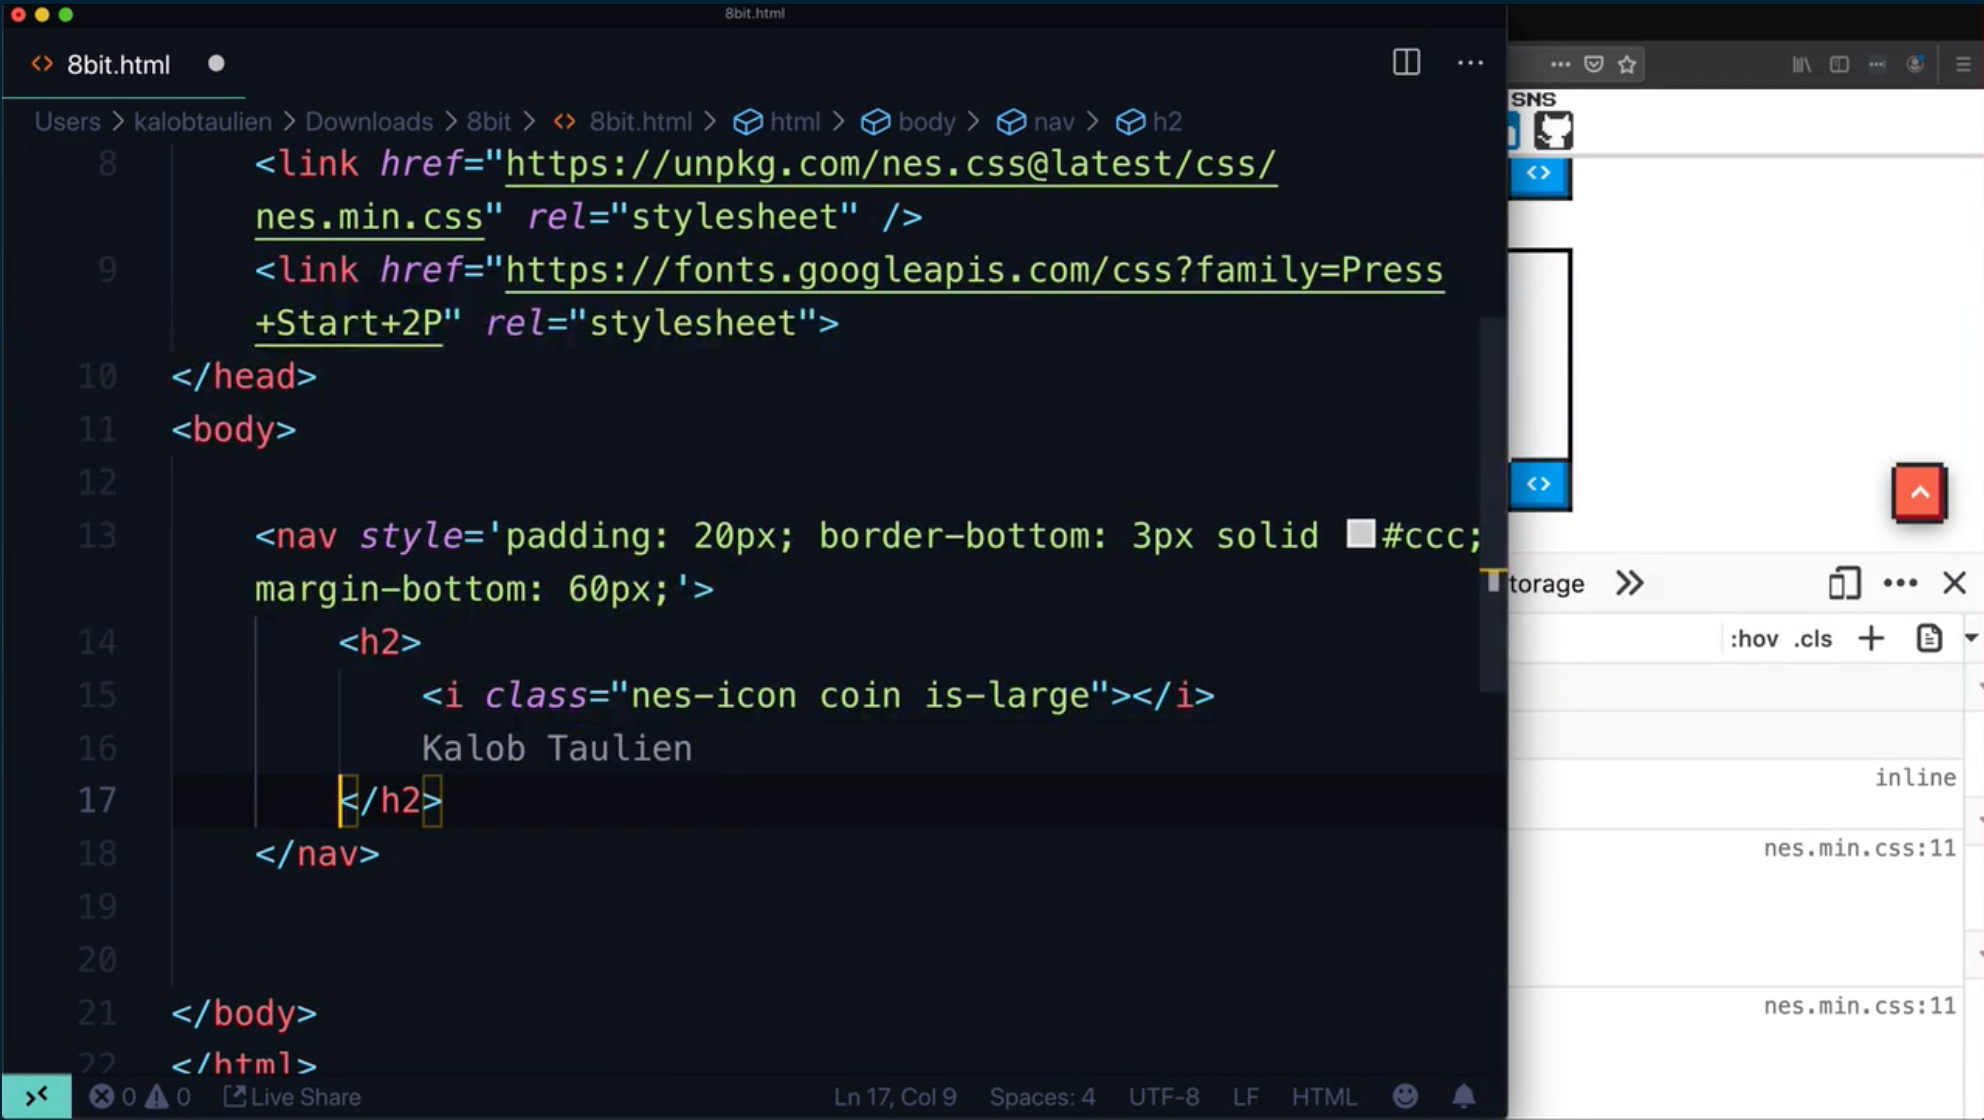
จากนั้นทำการสร้าง Navigation Bar ขึ้นมาเนอะ โดยจะใส่ชื่อเราขึ้นไปบนน้านนนน ก่อนอื่นเอา icon มาใส่ ในที่นี้คือรูปเหรียญเนอะ ในเว็บของ NES.css นั้นจะมีให้ copy ตัว attribute ไปแปะใน HTML ของเรา ตอนนี้ทำการก็อปแปะเลยจ้า
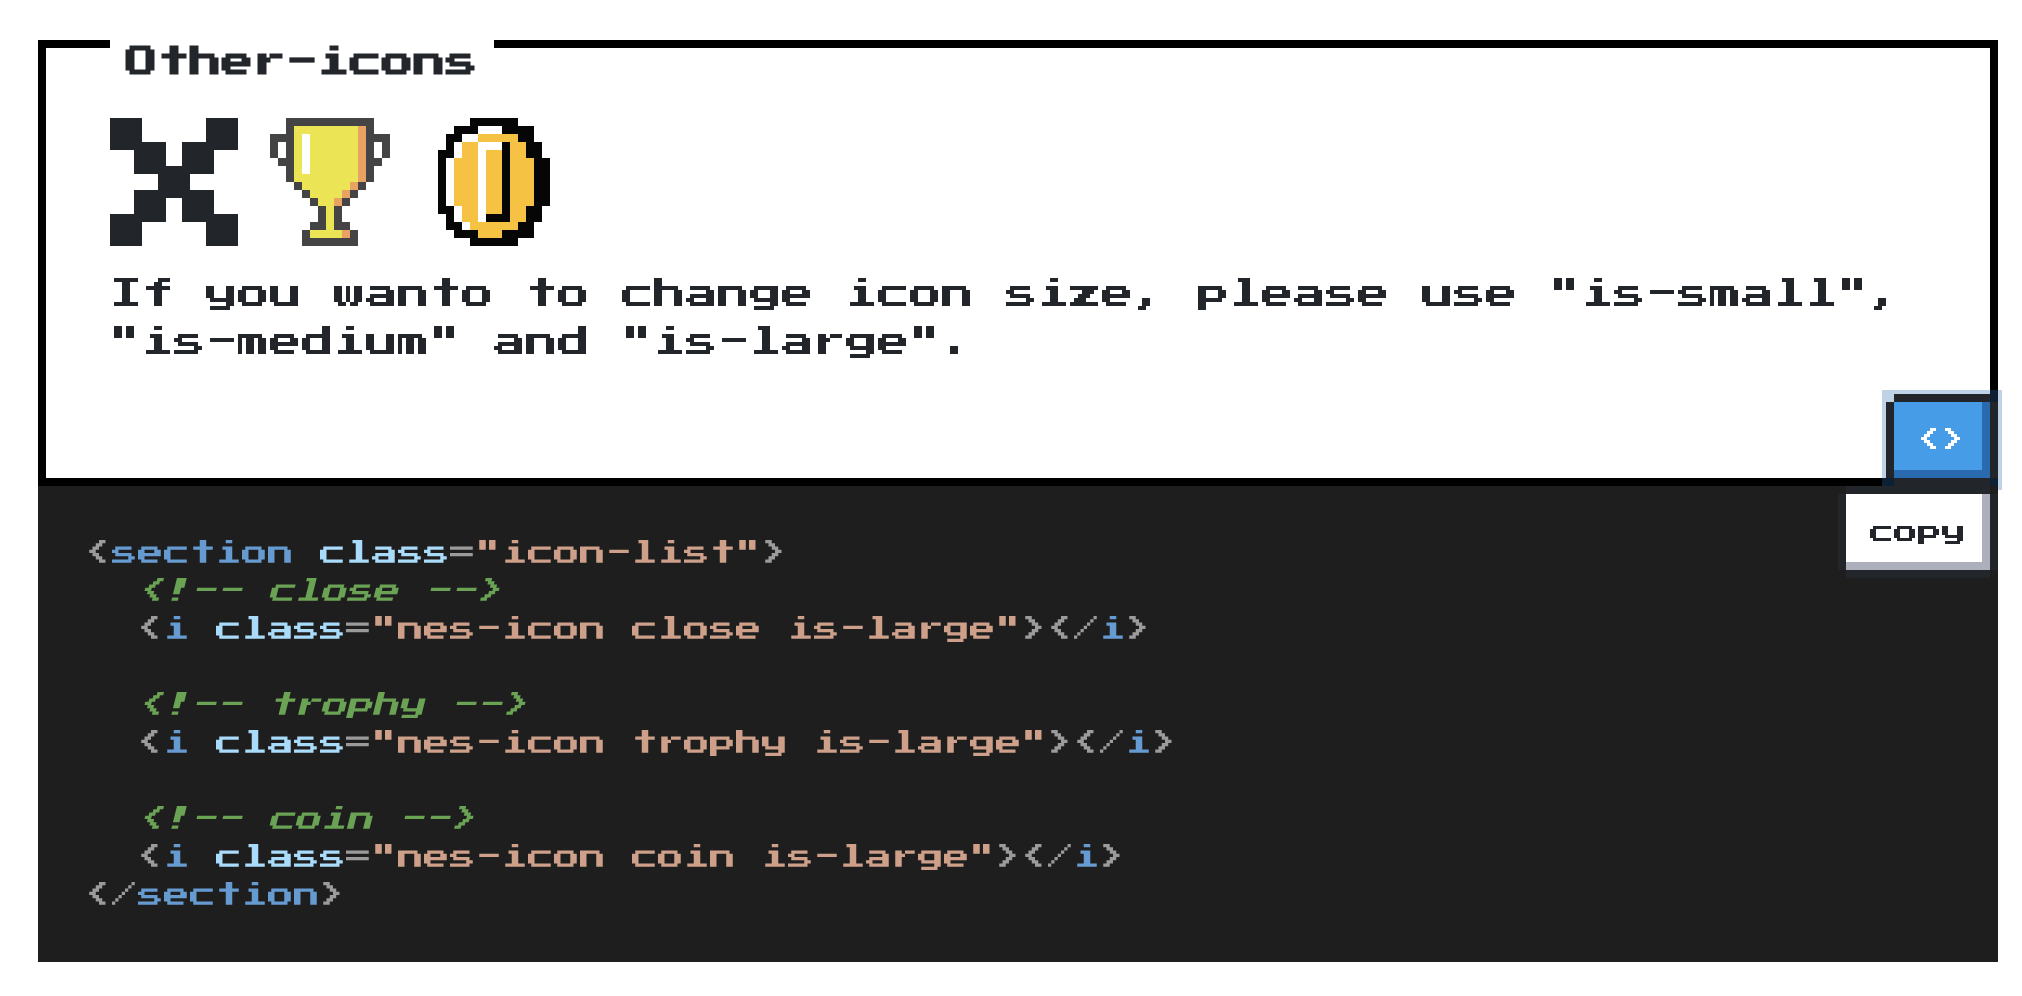
ทำการสร้าง nav แล้วใส่ style ลงไปให้เรียบร้อย ข้างในใส่ชื่อเราพร้อมกับ icon เหรียญเนอะ
ส่วนขนาดของไอคอนจะมี 3 ขนาดคือ is-small, is-medium และ is-large เนอะ

แต่ขนาดมันใหญ่ไปนิดนึง เอา is-large ออก ขนาดมันก็จะพอดีกับชื่อเราหล่ะ

โค้ดทั้งหมดในตอนนี้จะเป็นแบบนี้เนอะ
Adding a grid
มาสร้าง grid กันโดยใช้ Flexbox Grid จ้า หน้าตาจะเป็นประมาณนี้ จะคล้ายๆ Bootstrap เนอะ
การเอาไปแปะก็สามารถเข้าไปดูใน README ได้จ้า
kristoferjoseph
ก็คือเพิ่มเข้าไปใน head นั่นแหละว่าเราจะ include ตัวนี้เพิ่มน้าาาา ซึ่งยังไม่มีอะไร แค่ลงไปก่อนจ้า
<link rel="stylesheet" href="https://cdnjs.cloudflare.com/ajax/libs/flexboxgrid/6.3.1/flexboxgrid.min.css" type="text/css" >
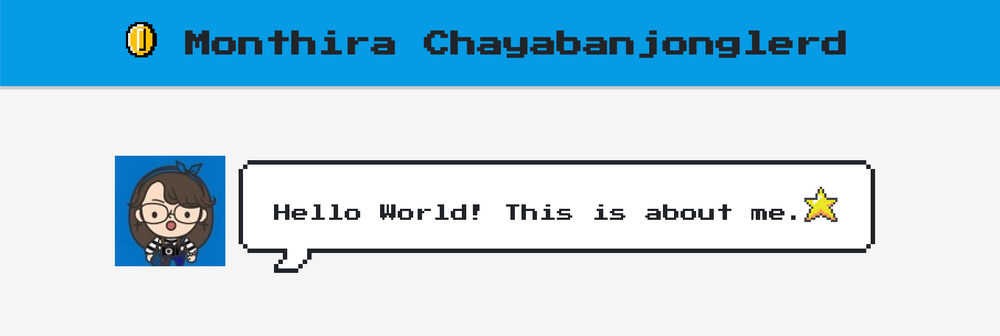
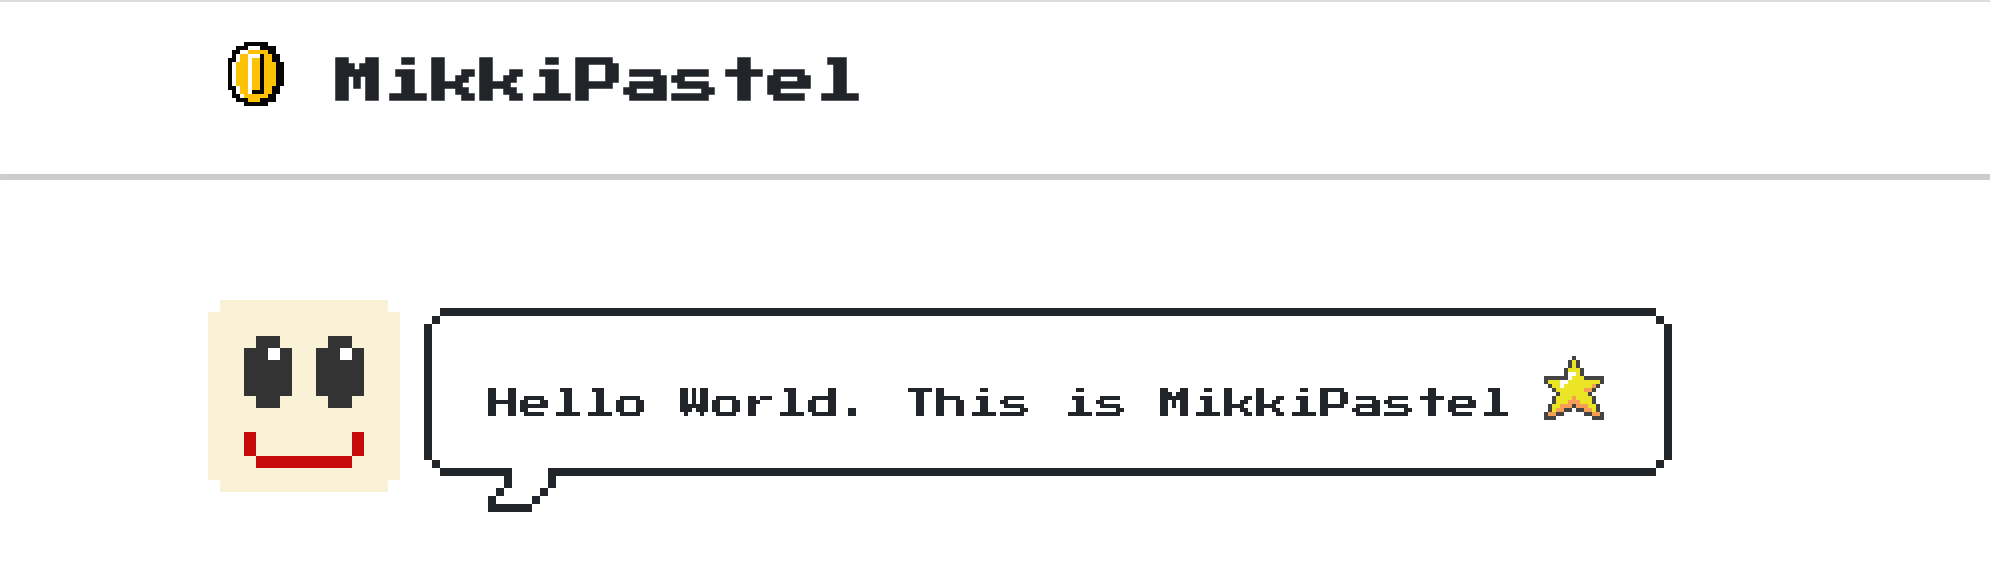
8-bit welcome balloon
ใส่ตัว text ballon เข้าไปโดยการใช้ Flexbox Grid แบ่งซ้ายขวา แบบนี้
จากนั้นแทนที่ด้านซ้ายด้วยน้องก้อนๆ และด้านขวาด้วย text ballon แล้วใส่ Reaction-icons เพิ่มไปดังนี้
<div class="container">
    <div class="row">
        <div class="col">
            <em class="nes-bcrikko"></em>
        </div>
        <div class="col-sm-9 col-xs-12">
            <div class="nes-balloon from-left">
                <p>
                    Hello World. This is MikkiPastel
                    <em class="nes-icon star"></em>
                </p>
            </div>
        </div>
    </div>
</div>
หน้าตาที่ได้จ้า
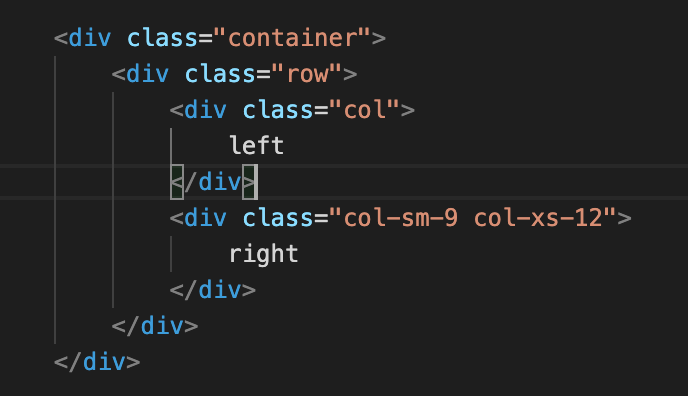
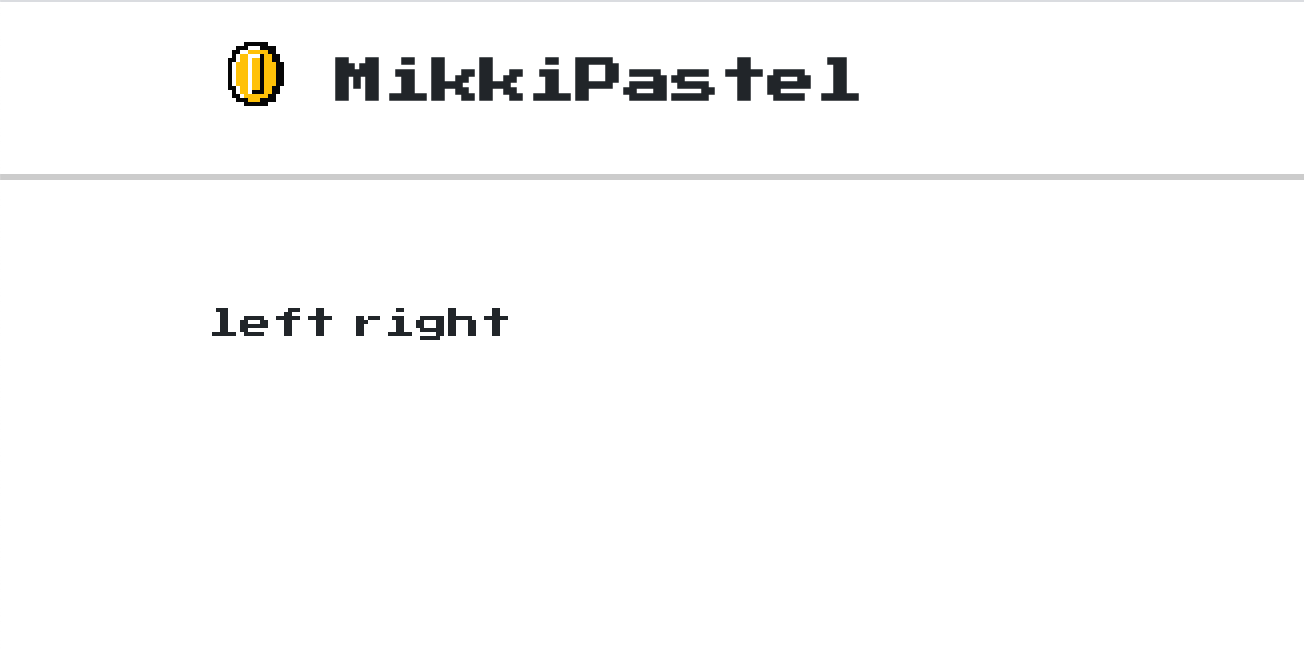
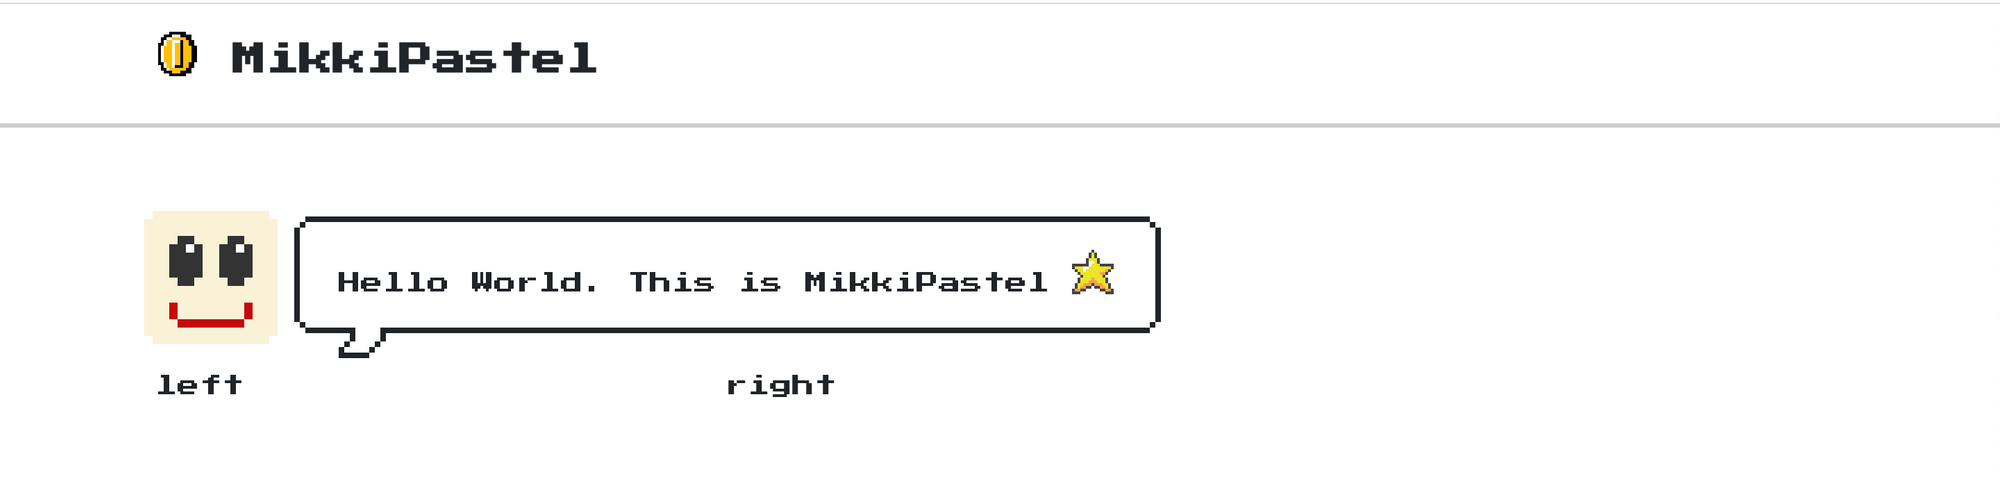
Two column layout
แบ่ง column ซ้ายขวากันเถอะ เพื่อเอามาใส่ content ต่างๆสำหรับ resume ของเรานั่นเอง
<div class="container">
    <div class="row">
        <div class="col-md-4 col-sm-12 col-xs-12">
            left
        </div>
        <div class="col-md-8 col-sm-12 col-xs-12">
            right
        </div>
    </div>
</div>
เราจะเห็นซ้ายขวาหล่ะ เดี๋ยวค่อยๆมาทำต่อเนอะ
8-bit sections
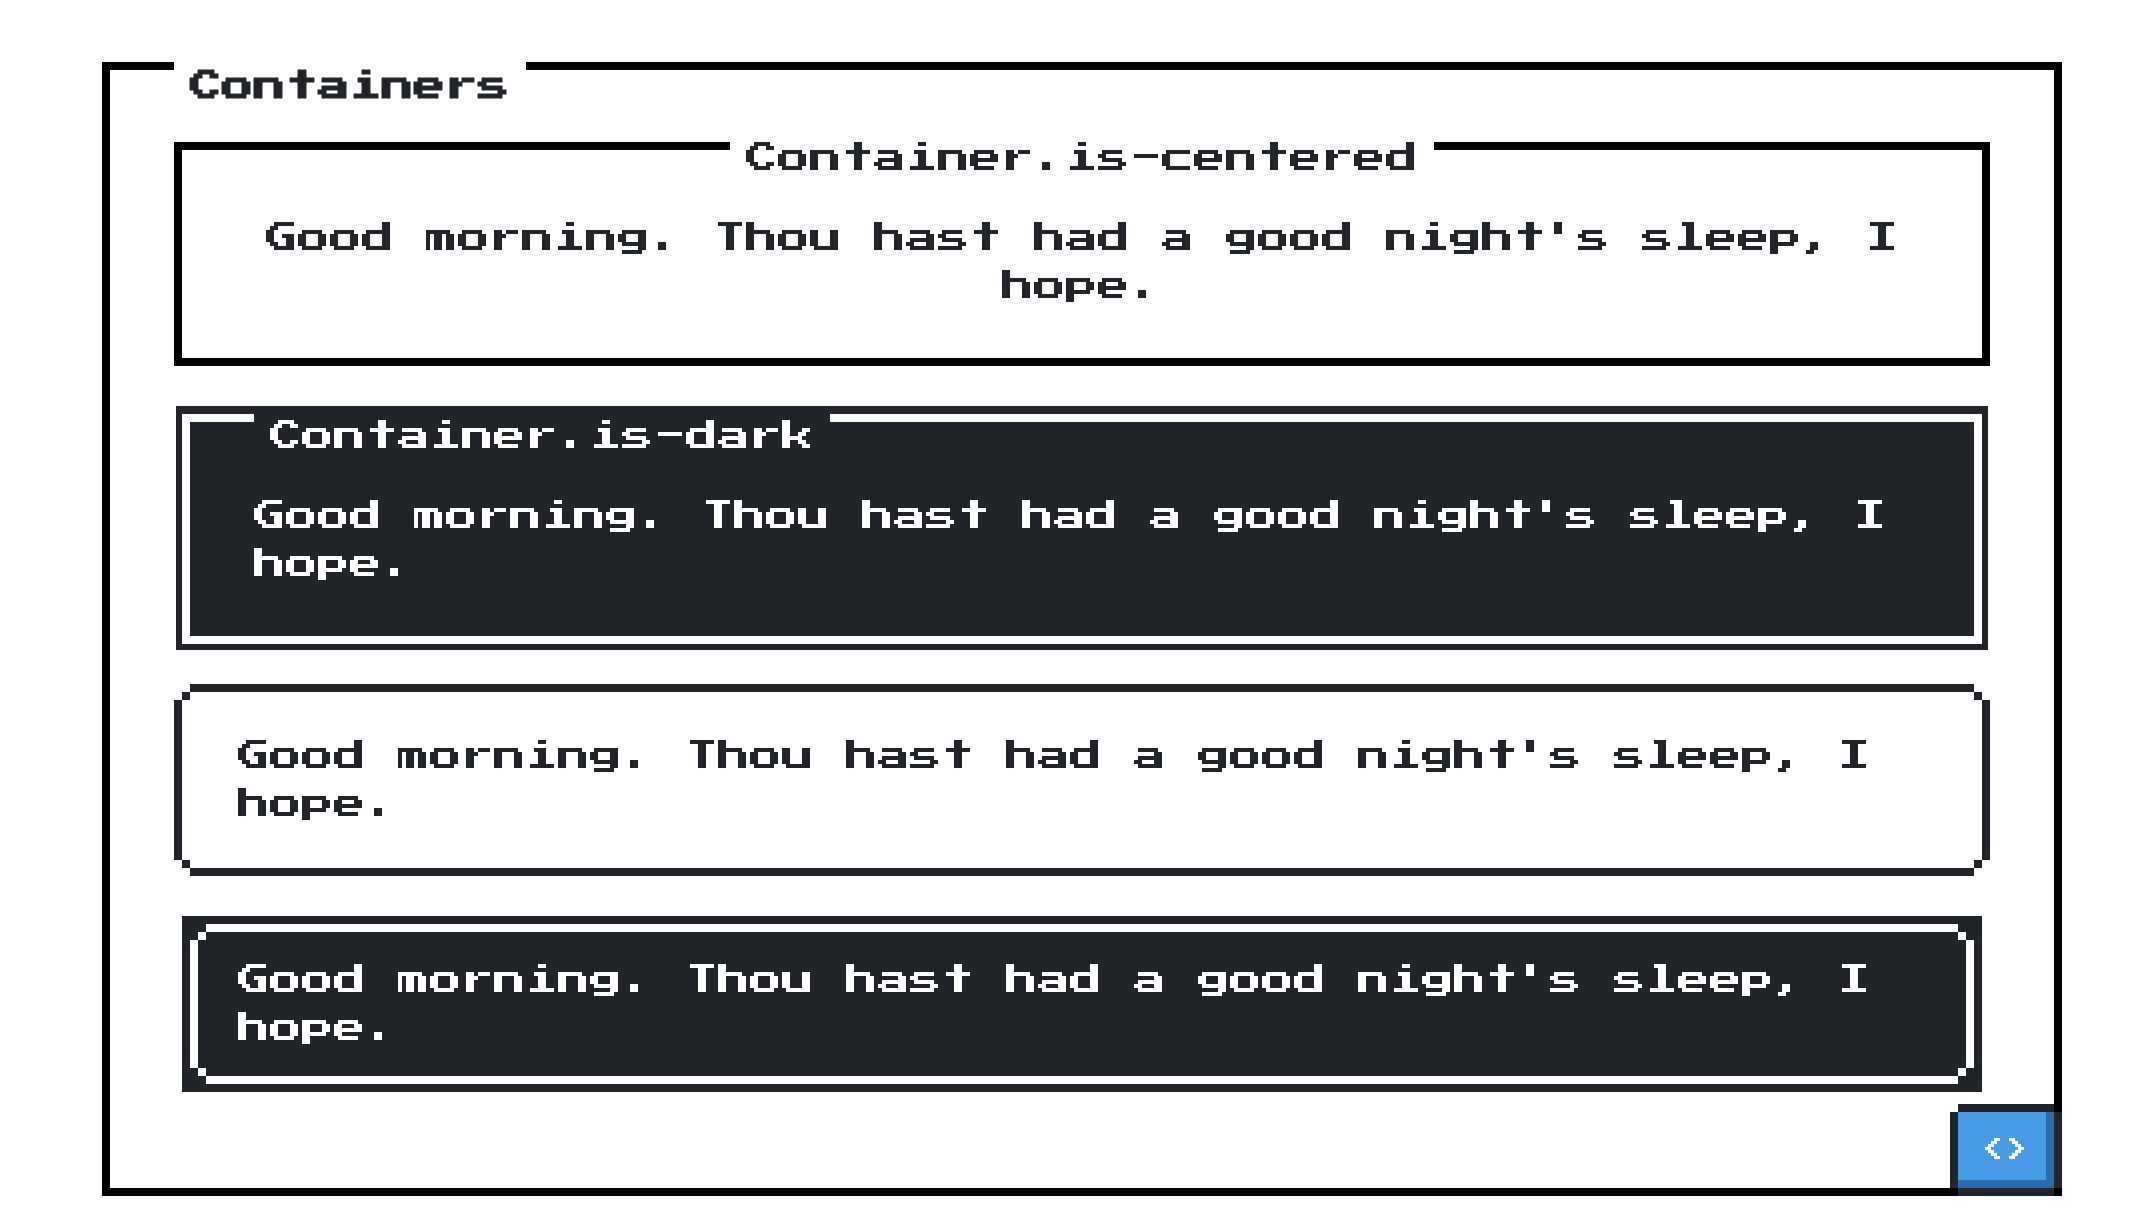
เพิ่ม content โดยการใช้ containers ของ nes.css โดยเขาจะมี
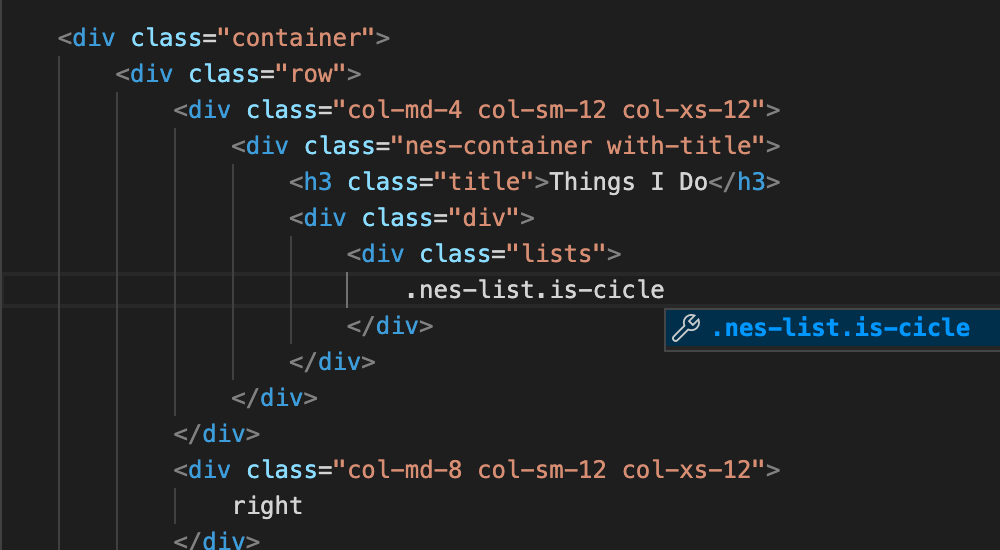
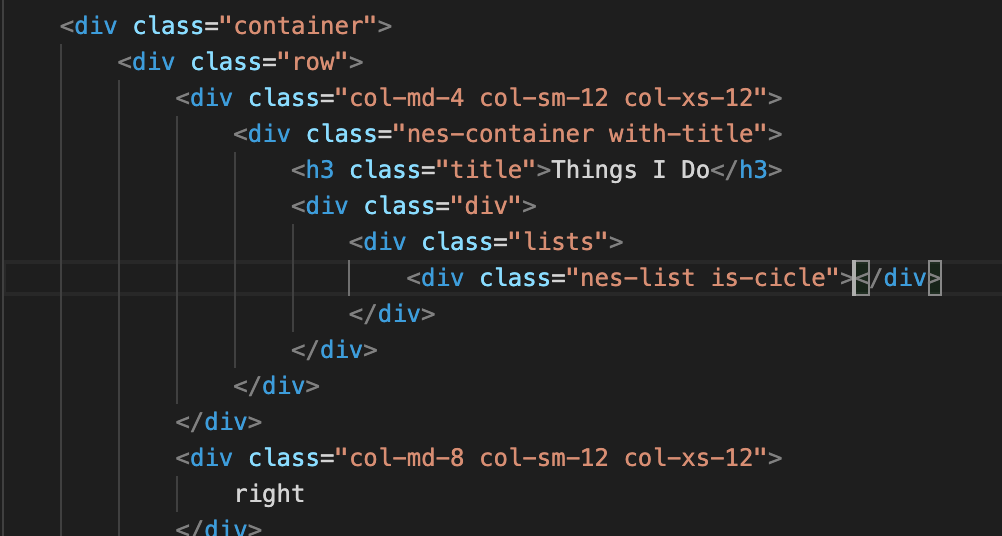
ทริคการใช้ VS Code ที่เห็นบ่อยในคอร์สนี้ นอกจากคาถาเสก html:5 ออกมาแล้ว จะมีคาถาเสก attribute ต่างๆ เช่น
- ใส่ .div แล้วกด enter ก็จะได้
<div class="div"></div> - ใส่แบบยาวๆ เช่น
nes-list.is-cicleก็จะได้เป็น<div class="nes-list is-cicle"></div> - หรือจะใส่ text พร้อมชื่อ class ก็ได้ เช่น h3.title จะได้เป็น
<h3 class="title"></h3>
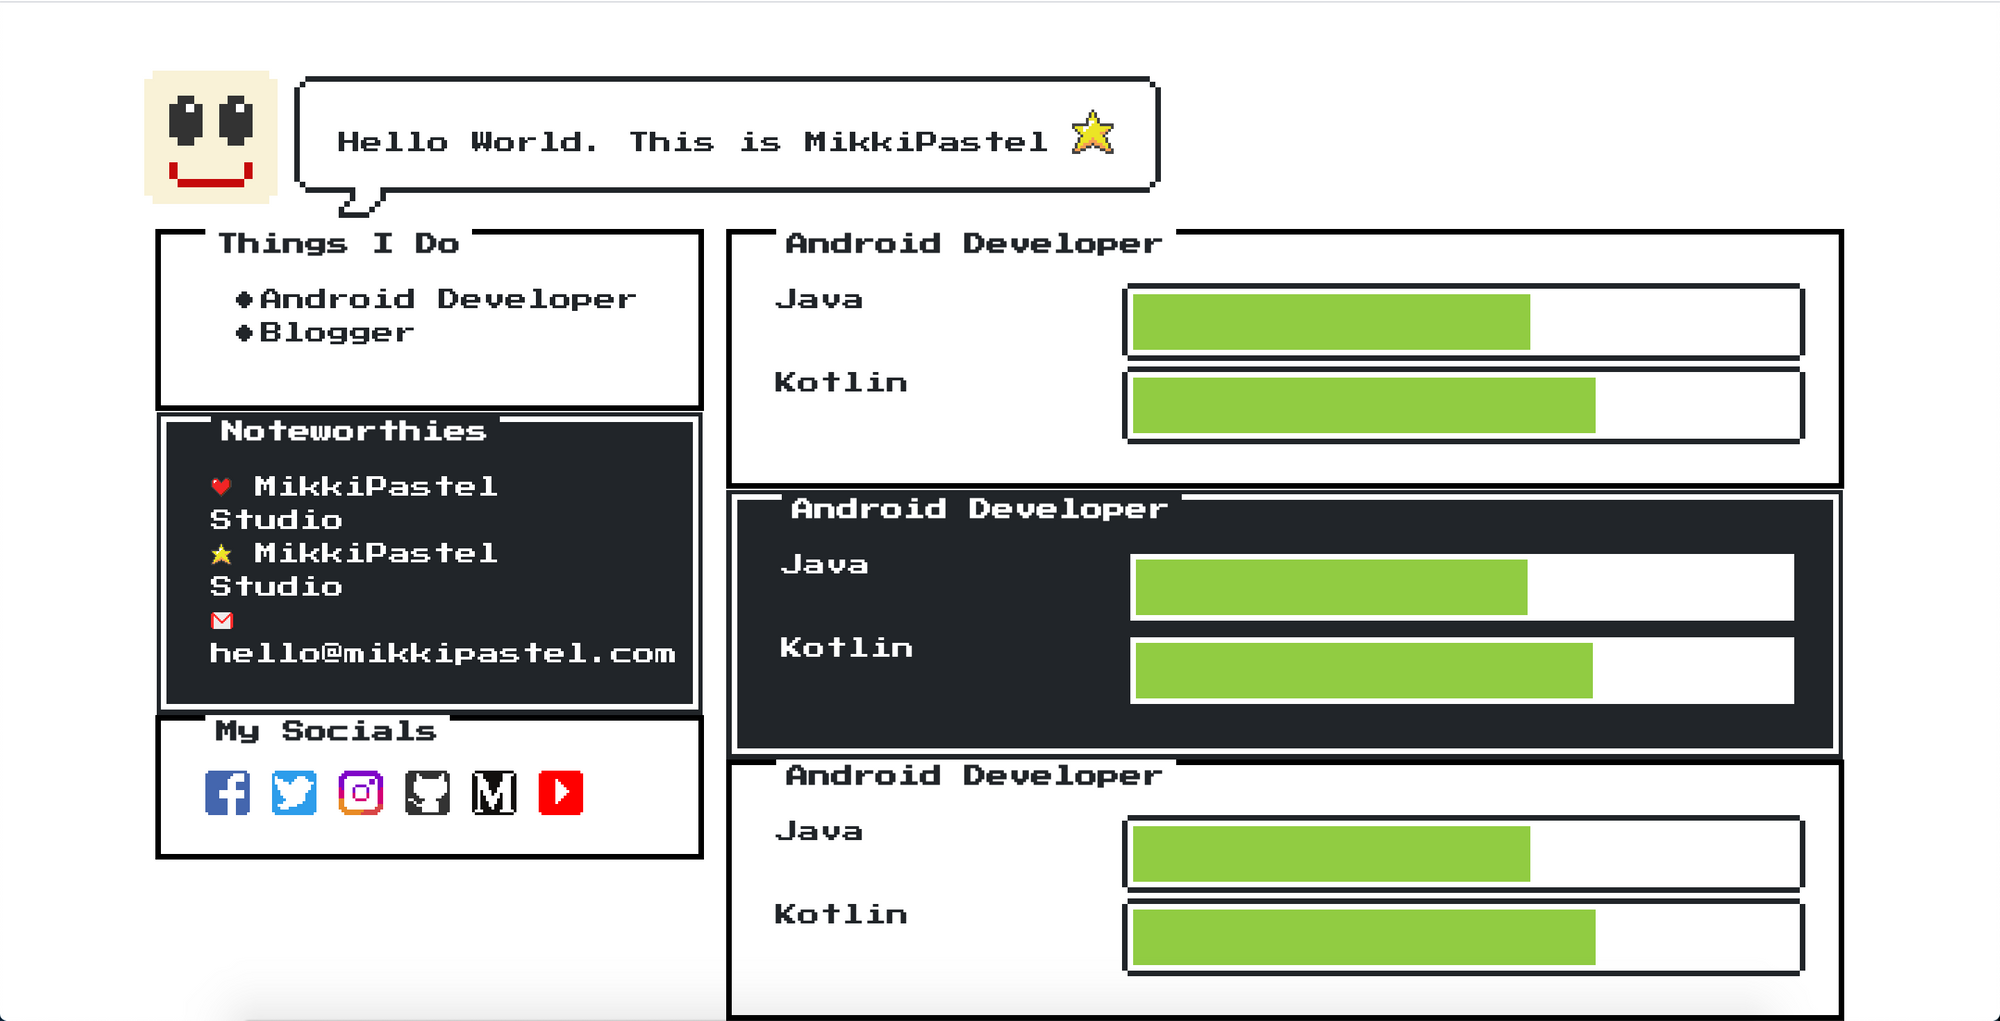
จากตัวอย่างจะเริ่มทำกรอบซ้ายบนก่อนเนอะ เป็นหัวข้อ Things I Do แล้วมี list อยู่ด้านใน ก็จะมีแบบจุดดำๆ กับจุดขอบดำเนอะ
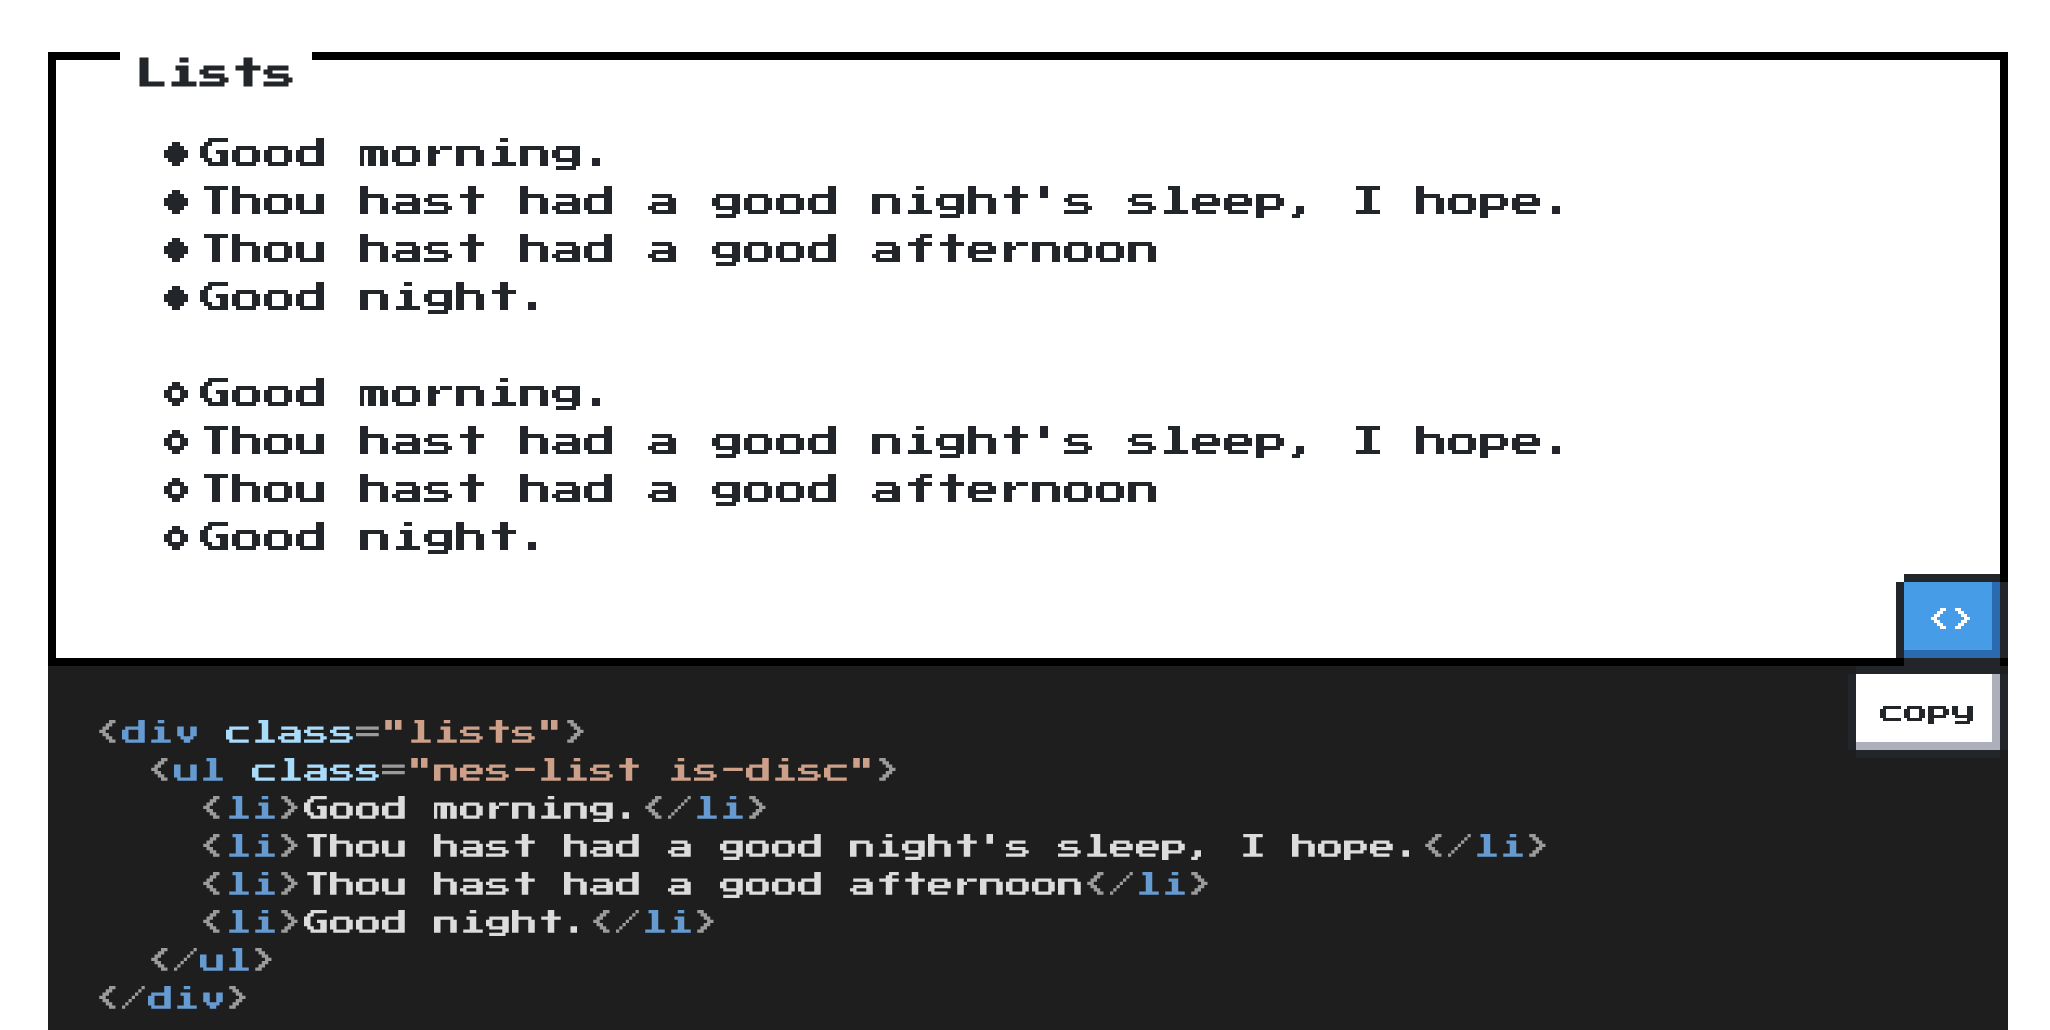
เราก็จะใส่สิ่งที่เราทำได้ลงไป หน้าตาจะเป็นแบบนี้เนอะ
ส่วนนี่โค้ดจ้า
<div class="nes-container with-title">
    <h3 class="title">Things I Do</h3>
    <div class="div">
        <div class="lists">
            <ul class="nes-list is-disc">
                <li>Android Developer</li>
                <li>Blogger</li>
            </ul>
        </div>
    </div>
</div>
Dark 8-bit sections and icons
เพิ่ม section ต่อมา หัวข้อ Noteworthies โดยหน้าตาจะเป็นแบบ dark แล้วเนอะ ไส้ในจะเป็น list ที่เพิ่มเติม icon ขึ้นมาจ้า ดังนั้นเราจะสร้าง div มาเพิ่ม แล้วข้างในมี icon หัวใจ และดาว อยู่ด้านหน้า และตามหลังมาด้วยสิ่งที่เราจะใส่จ้า ยังนึกไม่ออก ใส่ mockup ไปก่อนแล้วกันเนอะ
<div class="nes-container is-dark with-title">
    <h3 class="title">Noteworthies</h3>
    <div class="div">
        <i class="nes-icon is-small heart"></i>
        MikkiPastel Studio
    </div>
    <div class="div">
        <i class="nes-icon is-small star"></i>
        MikkiPastel Studio
    </div>
</div>
หน้าตาจะได้แบบนี้เนอะ
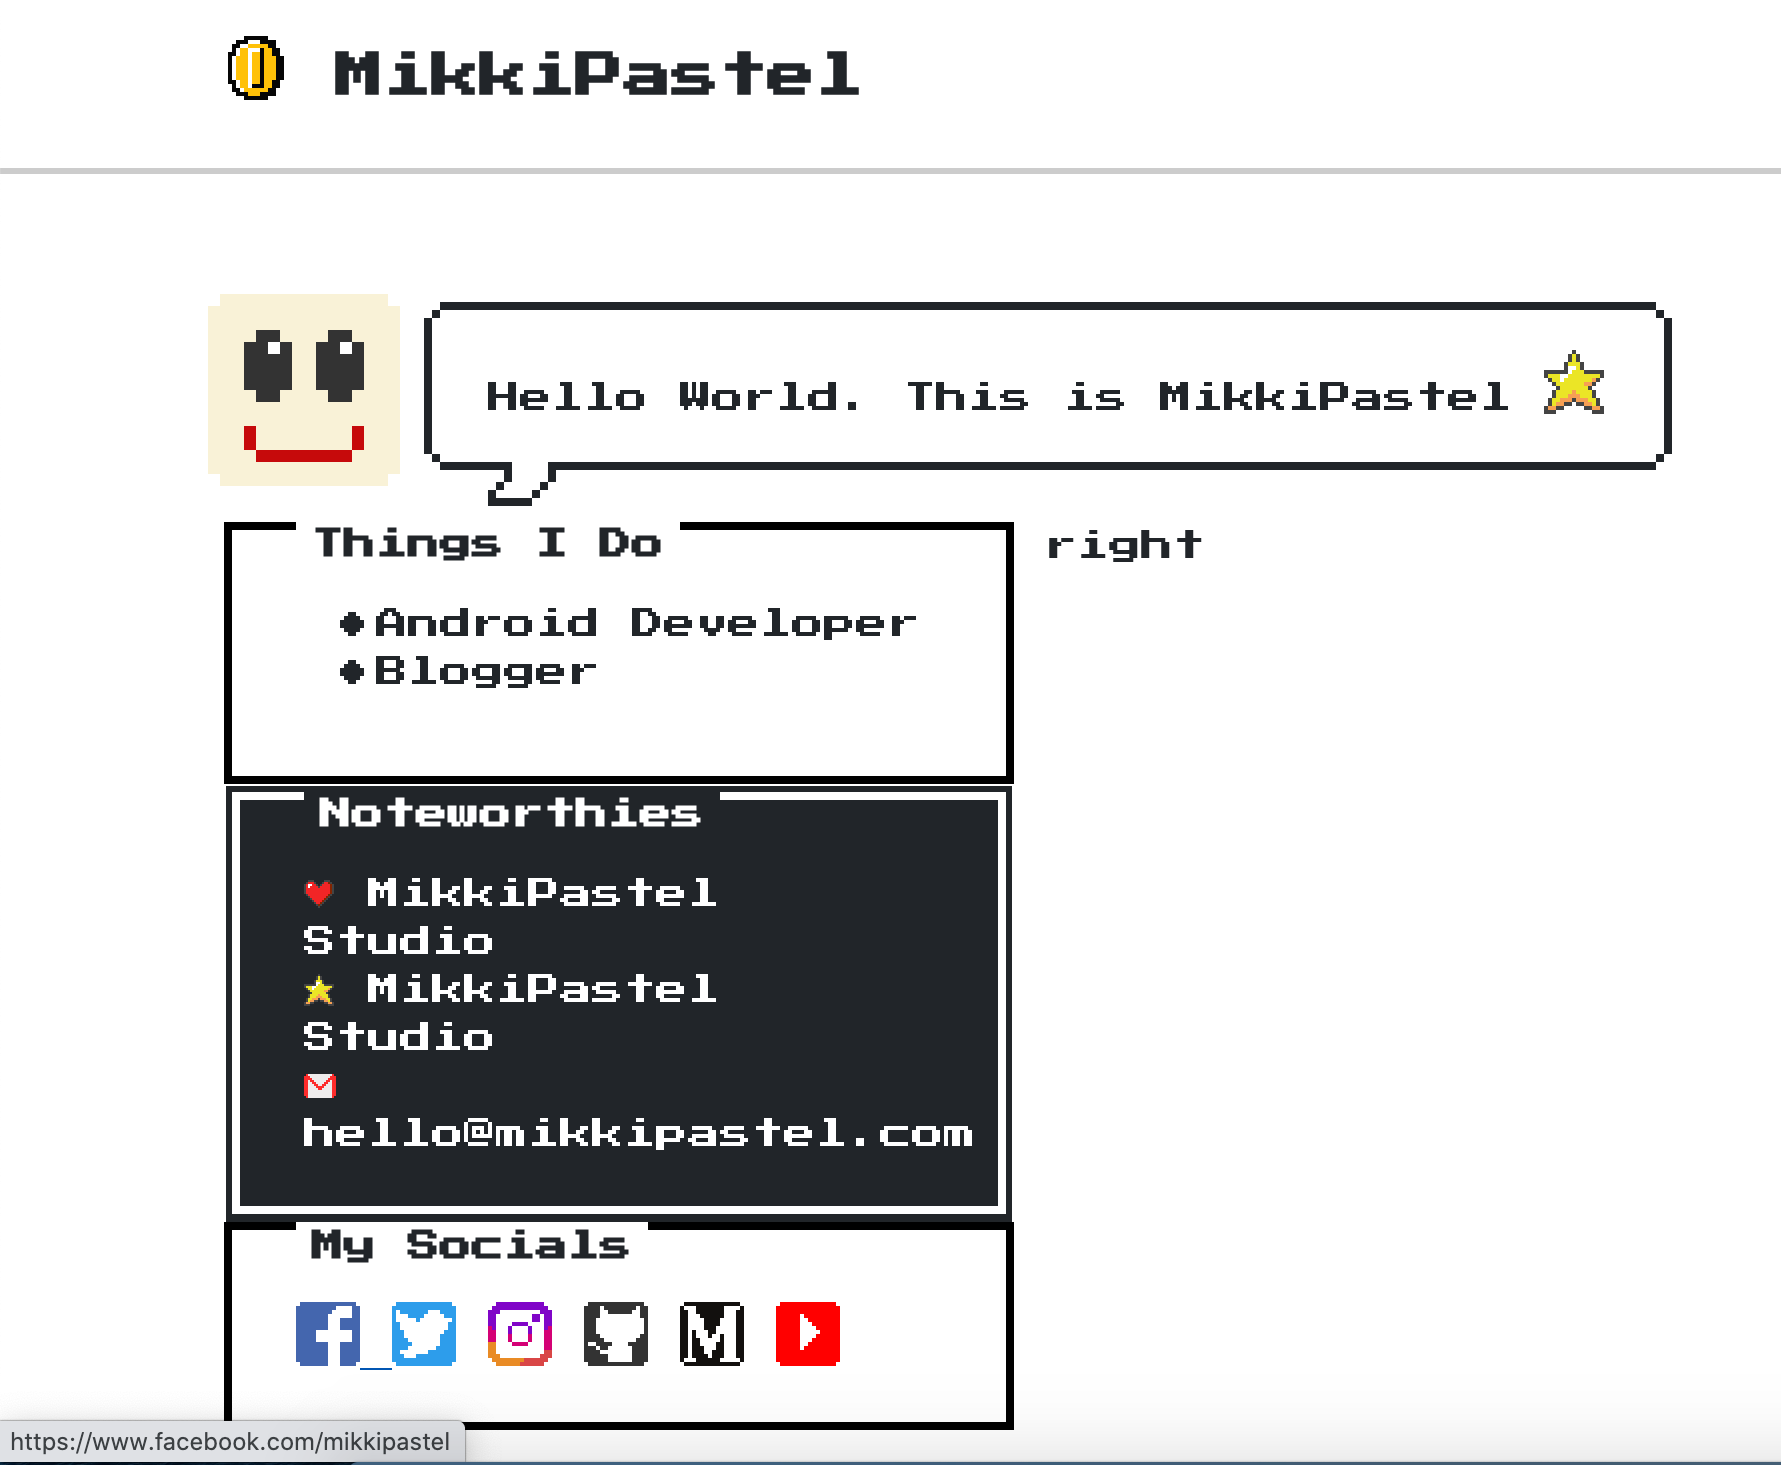
8-bit social icons
ทำส่วน My Socials ซึ่งจะใช้กรอบขาวมี title เหมือน Things I Do แต่ข้างในใส่ icon ของ social ต่างๆ โดยทาง NES.css นั้นมีให้เราเลือกใช้มากมาย ดังนี้
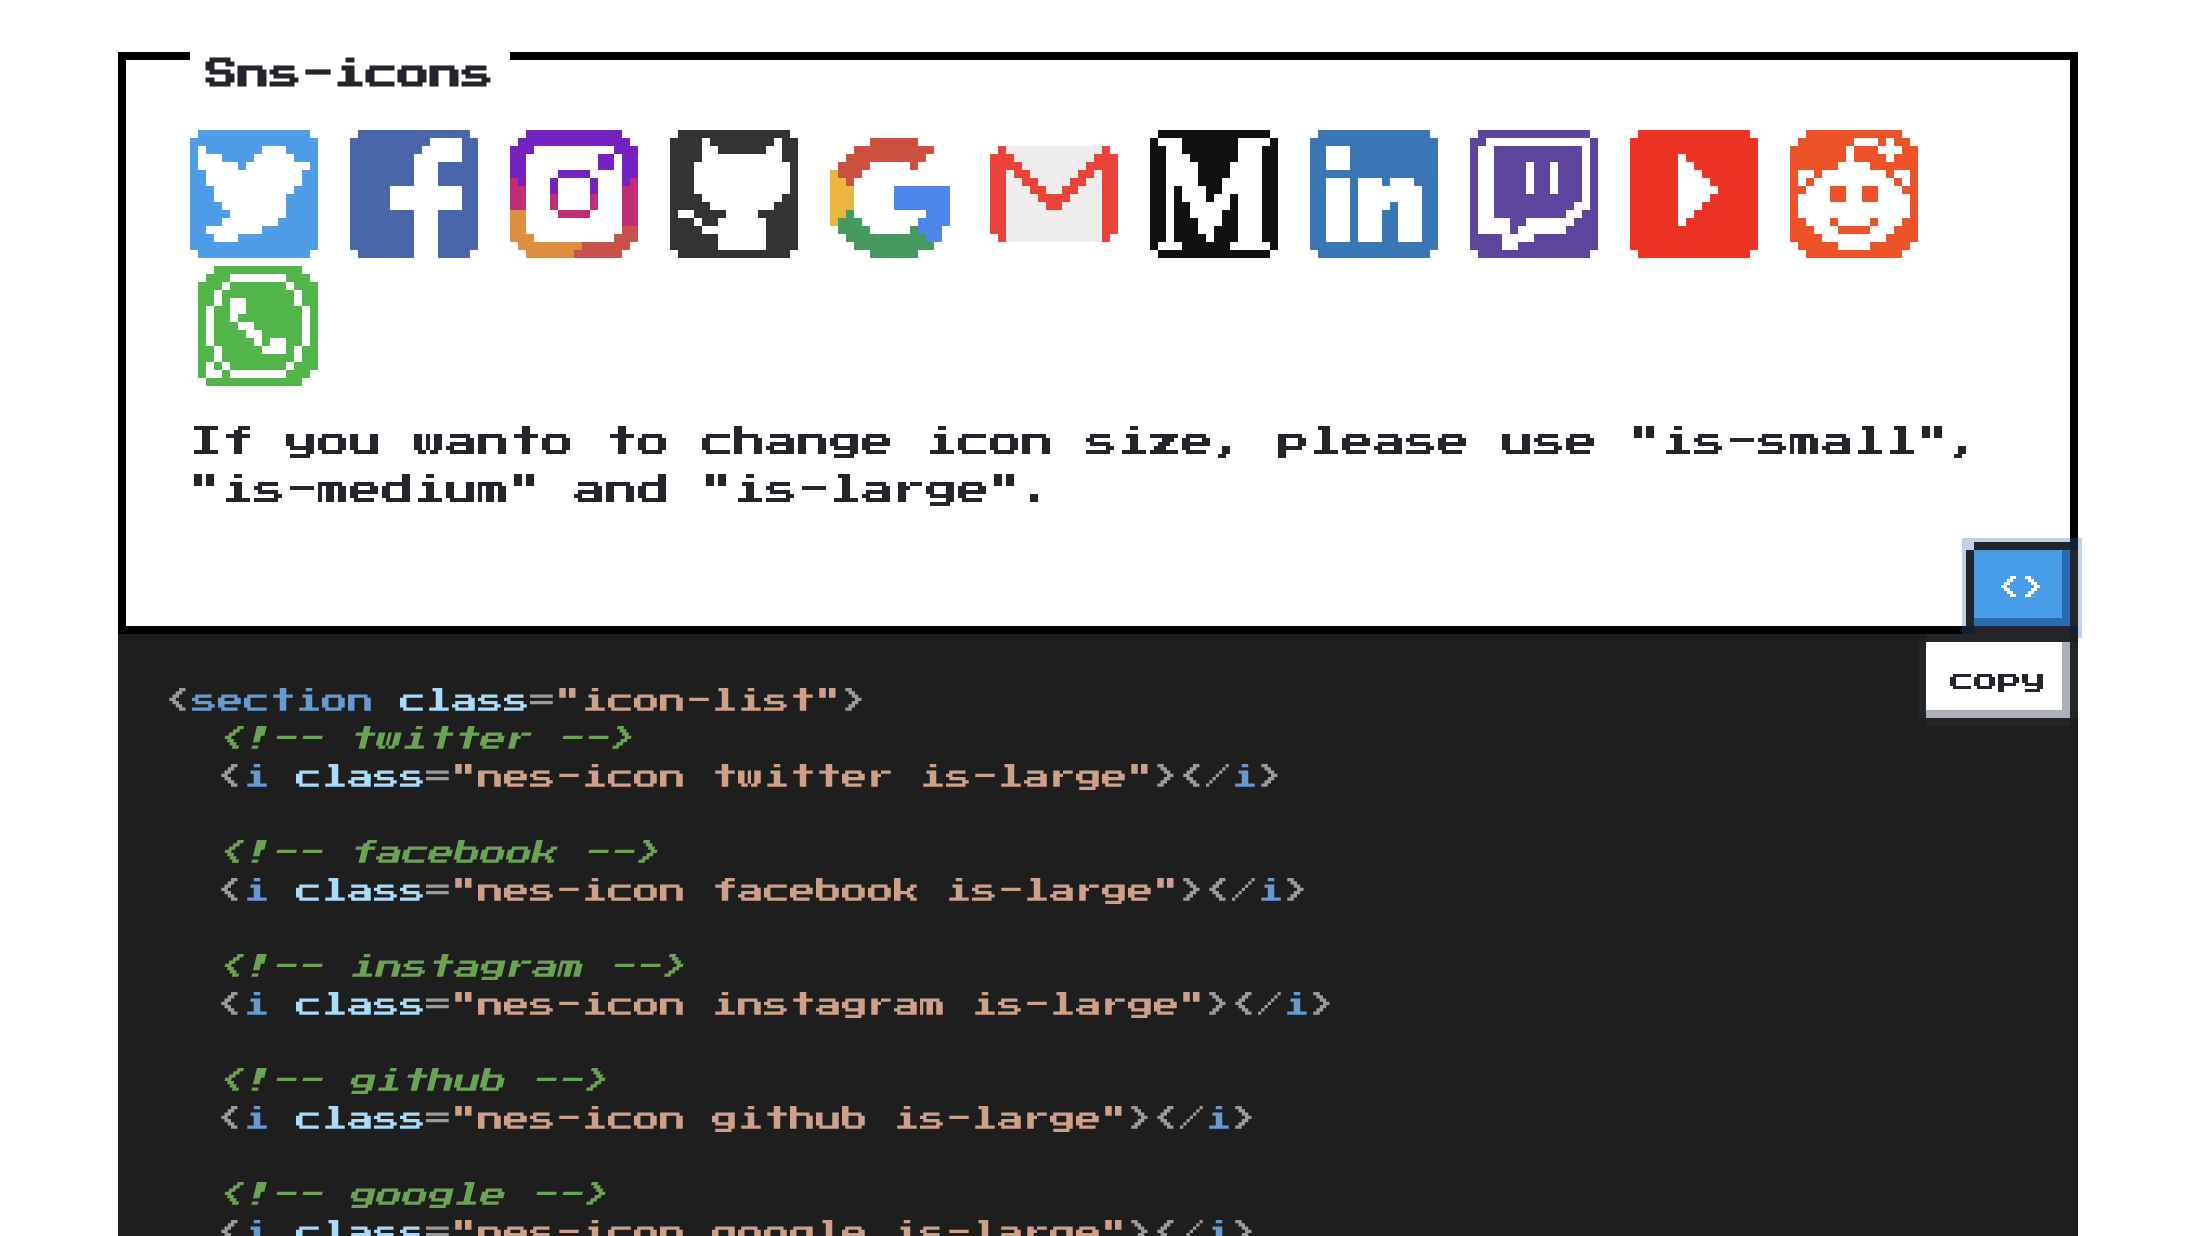
เราก็ทำการใส่ของเราไป ซึ่งก็เยอะพอสมควร เยอะไปไหน
<div class="nes-container with-title">
    <h3 class="title">My Socials</h3>
    <div class="div">
        <div class="lists">
            <a href="https://www.facebook.com/mikkipastel">
                <i class="nes-icon facebook"></i>
            </a>
            <a href="https://www.twitter.com/mikkipastel">
                <i class="nes-icon twitter"></i>
            </a>
            <a href="https://www.instagram.com/mikkipastel">
                <i class="nes-icon instagram"></i>
            </a>
            <a href="https://www.github.com/mikkipastel">
                <i class="nes-icon github"></i>
            </a>
            <a href="https://medium.com/@minseobingsu">
                <i class="nes-icon medium"></i>
            </a>
            <a href="https://www.youtube.com/user/sanaka2006">
                <i class="nes-icon youtube"></i>
            </a>
        </div>
    </div>
</div>
สุดท้ายก็จะได้แบบนี้เนอะ

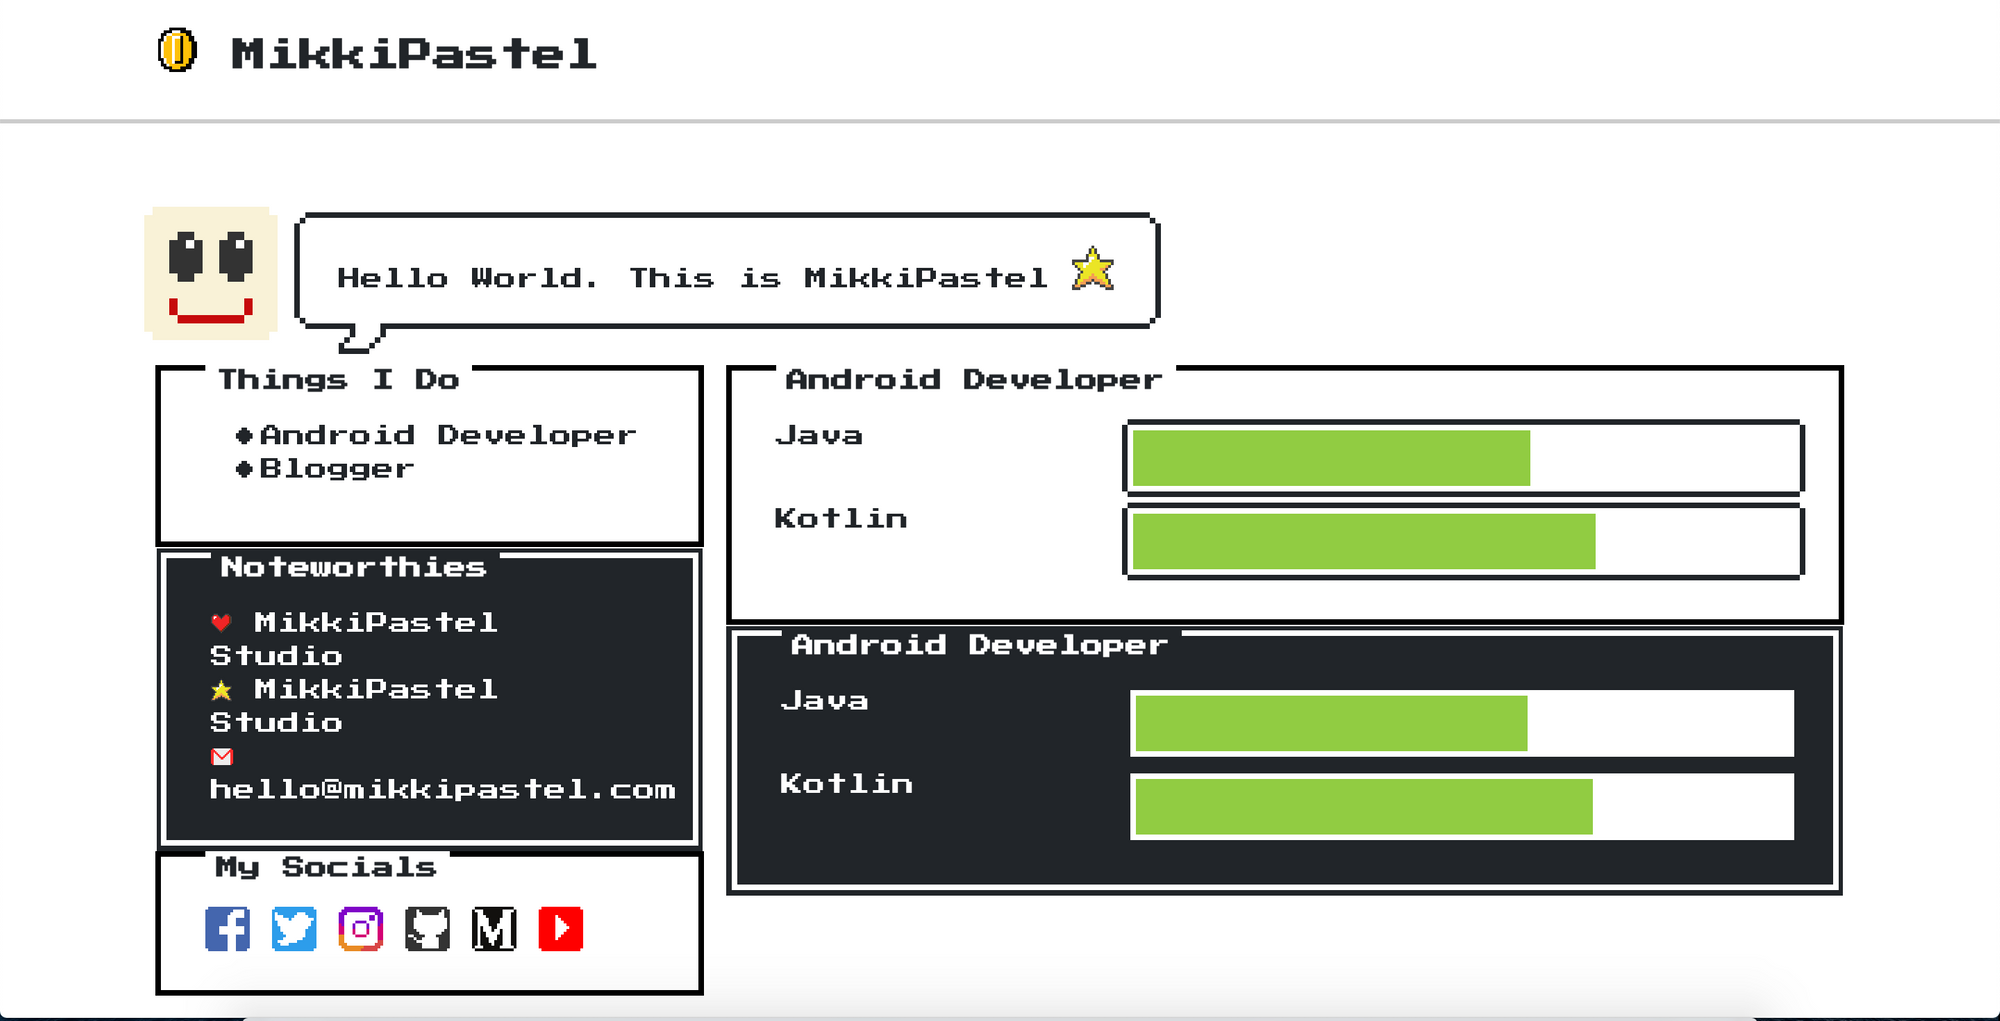
The right column
ด้านขวาเริ่มใส่แถบพลังมาหล่ะ ทำตามไปก่อนแล้วกันค่อยลบออก เพราะ HR ไม่ค่อยชอบเท่าไหร่ 55555555555 สามารถใช้ attribute ที่ชื่อว่า Progress ได้จ้า ซึ่งสี default เป็นสีดำแหละ สามารถเปลี่ยนสีได้ เช่น สีเขียวคือ is-success สีเหลืองคือ is-warning และเราสามารถ set value ว่าให้แถบ progress เท่าไหร่ และค่า max ของมันคือเท่าไหร่
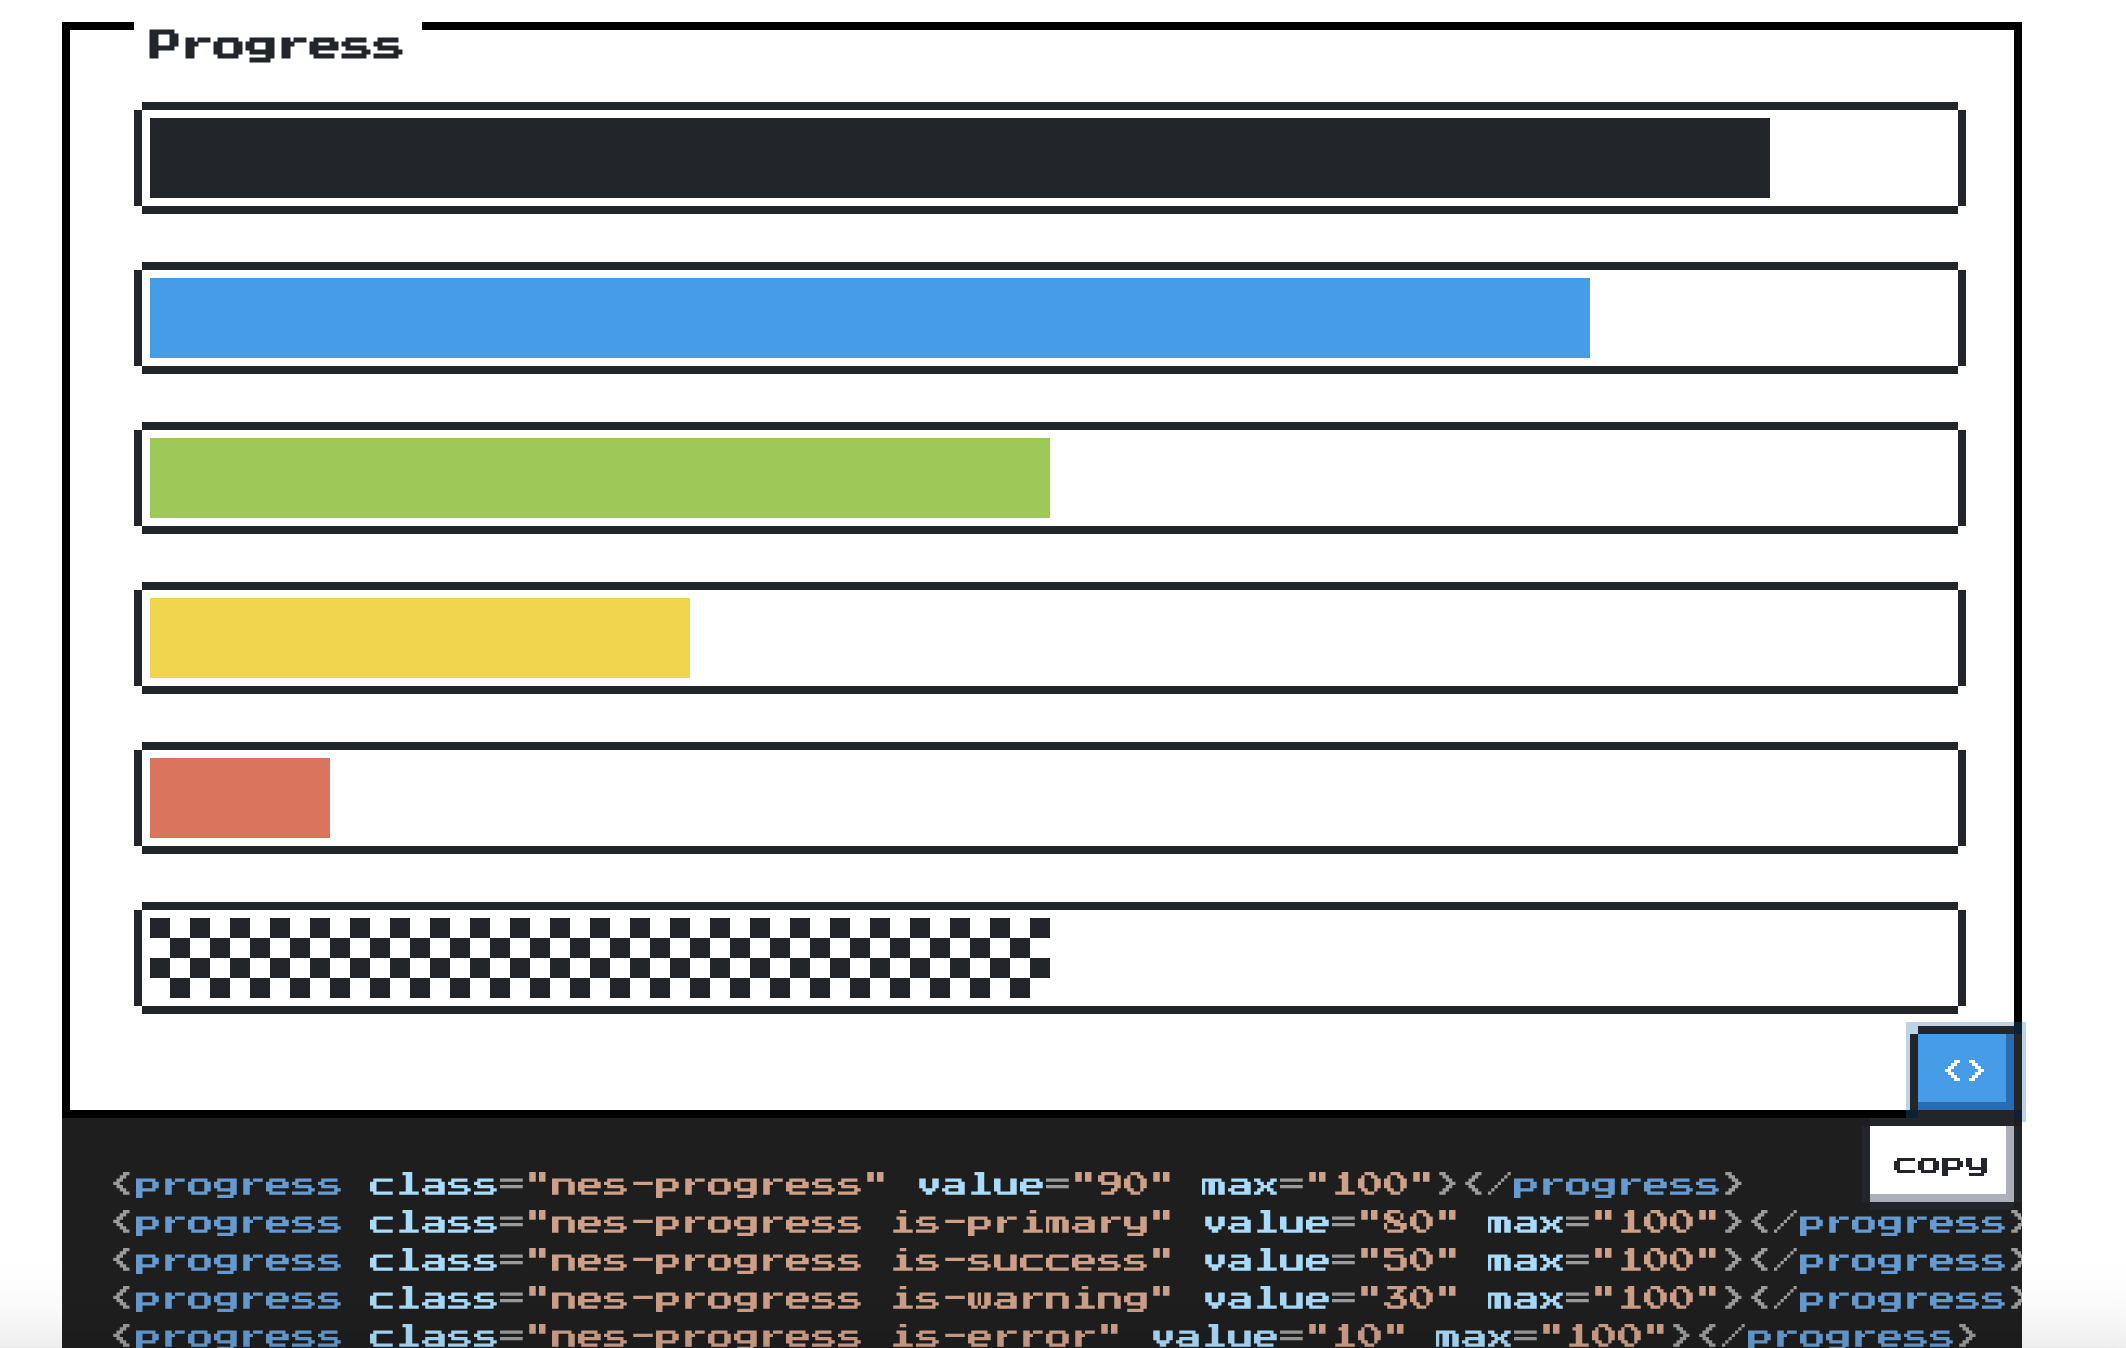
เราก็ลองใส่ text ดูพร้อมกับใส่ progress ลงไป
<div class="nes-container with-title">
    <h3 class="title">Android Developer</h3>
    <div class="row">
        <div class="col-sm-4 col-xs-12">Java</div>
        <div class="col-sm-8 col-xs-12">
            <progress
                      class="nes-progress is-success"
                      value="60"
                      max="100">
            </progress>
        </div>
    </div>

    <div class="row">
        <div class="col-sm-4 col-xs-12">Kotlin</div>
        <div class="col-sm-8 col-xs-12">
            <progress
                      class="nes-progress is-success"
                      value="70"
                      max="100">
            </progress>
        </div>
    </div>
</div>
ผลที่ได้จะเป็นแบบนี้แหละ เราก็ใส่ไปก่อน เดี๋ยวมาลบออกเนอะ

Large dark 8-bit section
เหมือนมะกี้แต่ใช้แบบ dark จะได้งี้
<div class="nes-container with-title is-dark">
    <h3 class="title">Android Developer</h3>
    <div class="row">
        <div class="col-sm-4 col-xs-12">Java</div>
        <div class="col-sm-8 col-xs-12">
            <progress
                      class="nes-progress is-success"
                      value="60"
                      max="100">
            </progress>
        </div>
    </div>

    <div class="row">
        <div class="col-sm-4 col-xs-12">Kotlin</div>
        <div class="col-sm-8 col-xs-12">
            <progress
                      class="nes-progress is-success"
                      value="70"
                      max="100">
            </progress>
        </div>
    </div>
</div>
Large light 8-bit section
และอีกอันก็จะเหมือนอันบนสุด งั้นข้ามโค้ดแล้วกันเนาะ มันก็อปวางง่ะ
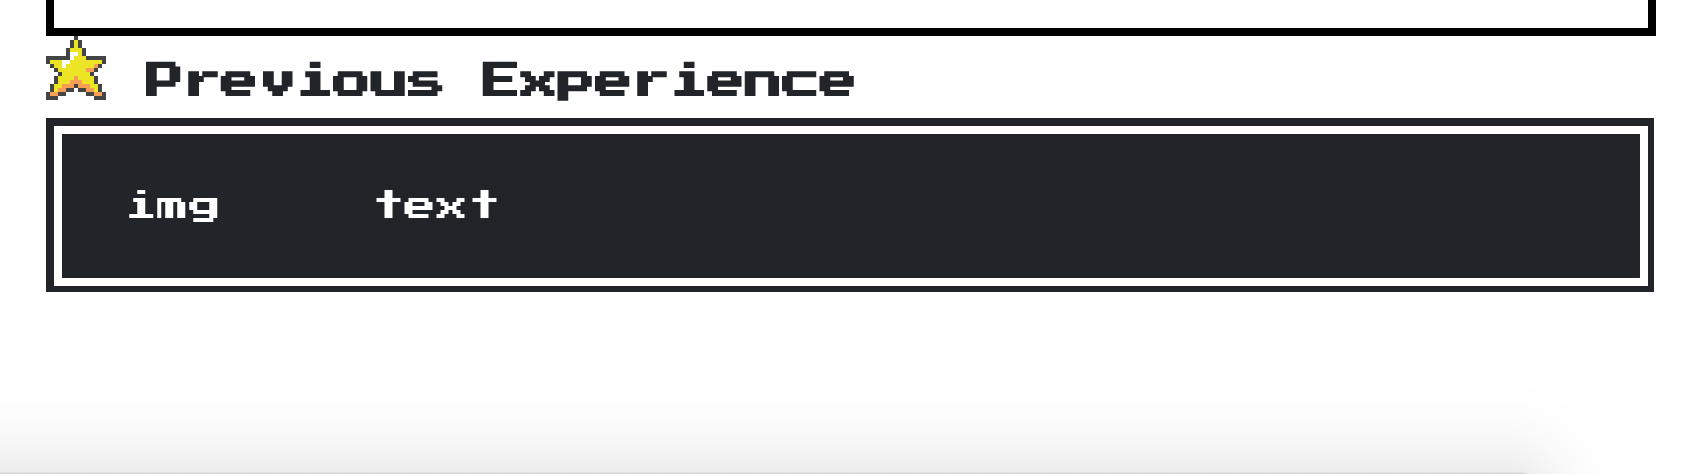
8-bit profile section
อันนี้ค่อยมีประโยชน์หน่อย ใส่ว่าเราทำงานที่ไหนมาบ้างงงง ก่อนอื่นเราจะแบ่งซ้ายขวา ซ้ายใส่รูป logo บริษัท ส่วนขวาคือหน้าที่การงานของเรา มาแบ่งกันก่อนจ้า
<h3 class="topic-title">
    <i class="nes-icon star"></i> Previous Experience
</h3>
<div class="nes-container is-dark">
    <div class="row">
        <div class="col-xs-2">
            img
        </div>
        <div class="col-xs-10">
            text
        </div>
    </div>
</div>
จะได้หน้าตาแบบนี้ แต่ความอัดแน่นมาต่อเนื่อง พอเลื่อนลงมาสุดมันไม่มีช่องว่างเลยนี่สิ

เลยต้อง padding เพื่อไม่ให้ชิดล่างจอจนเกินไป โดยใส่ style ชุดนี้เข้าไปใน head
<style>
    body {
        padding-bottom: 90px;
    }
</style>
ผลที่ได้คือดีขึ้นแหละ
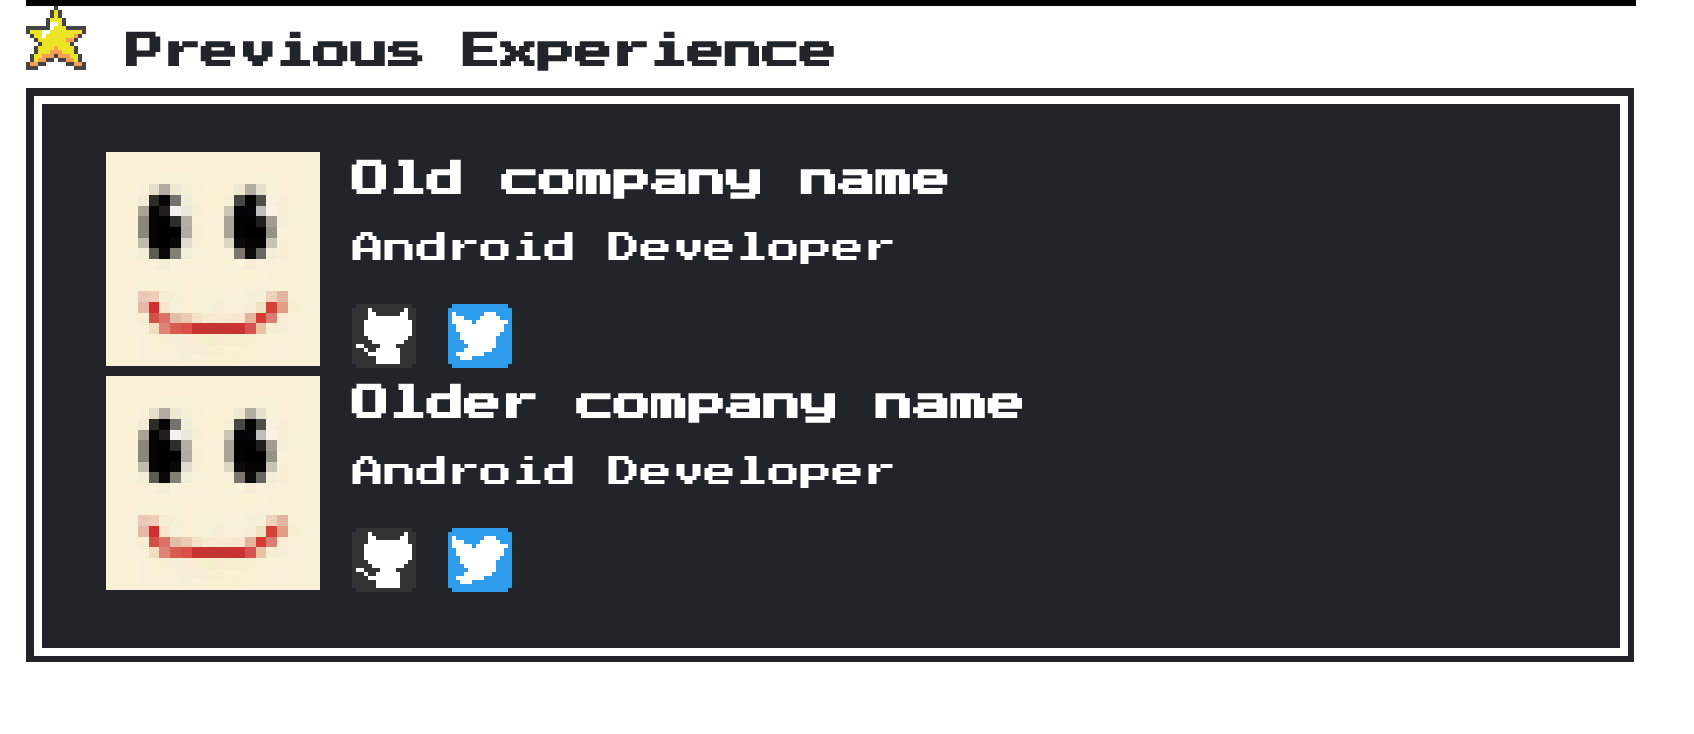
จากนั้นทำการใส่ข้อมูลต่างๆลงไป
<h3 class="topic-title">
    <i class="nes-icon star"></i> Previous Experience
</h3>
<div class="nes-container is-dark">
    <div class="row">
        <div class="col-xs-2">
            <img
                 src="https://github.com/BcRikko.png?size=20"
                 style="width: 100%; height: auto; image-rendering: pixelated; image-rendering: -moz-crisp-edges;"/>
        </div>
        <div class="col-xs-10">
            <h3>Old company name</h3>
            <p>Android Developer</p>
            <div>
                <a href="#">
                    <div class="nes-icon github"></div>
                </a>
                <a href="#">
                    <div class="nes-icon twitter"></div>
                </a>
            </div>
        </div>
    </div>
</div>
หน้าตาที่ได้จะเป็นแบบนี้เนอะ
8-bit spacing
มันติดกันอ่ะเตงงง มันติดกันนน จัดมันเว้นระยะห่างโหน่ยย โดยการใส่ margin ในที่ต่างๆให้ออกมาสวยงามเนอะ โค้ดจะมัดรวมให้ตอนจบจ้า
The footer
จบการ coding ด้วยการใส่ footer ด้านล่างเว็บไซต์เนอะ

<div class="container" style="margin-top: 50px; font-size: 60%;">
<div class="row">
<div class="col-xs-12" style="text-align: center; color: #ccc;">
Ironi©cally I don't care for NES games in 2020.
</div>
</div>
</div>
สรุปโค้ดทั้งหมดที่เขาสอนเป็นดังนี้
และเราก็ลองปรับๆแก้ๆ เอาแถบพลังออก จะได้แบบนี้จ้า
จริงๆก็แอบเจอบทความนี้อยู่นะ แหะๆ แต่ไม่ได้ check ว่าตรงกันไหมอะนะ อิอิ
 Koji (he/him)
ติดตามข่าวสารและบทความใหม่ๆได้ที่
อย่าลืมกด like กด share บทความกันด้วยนะคะ :)
Posted by MikkiPastel on Sunday, 10 December 2017
และช่องทางใหม่ใน Twiter จ้า
สวัสดีจ้า ฝากเนื้อฝากตัวกับชาวทวิตเตอร์ด้วยน้าา
— mikkipastel (@mikkipastel) August 24, 2020